- BlackBerry AtHoc set up and administration overview
- Manage organizations
- Configure BlackBerry AtHoc settings
- Configure basic settings
- Manage system settings
- Specify system settings options
- Add or remove a disclaimer for the BlackBerry AtHoc management system
- Security policy settings
- Define password rules
- Configure password complexity
- Enforce a system-wide password update
- Revoke operator permissions automatically
- Set session timeout and continue session values
- Limit active sessions
- Enable operator login using smart cards
- Require operator login using smart cards
- Enable SSO certificate revocation list checking
- Import a service provider certificate
- Enable CAPTCHA validation
- Monitor system health
- View the diagnostic log
- View geolocation transactions and logs
- Database archiving
- Organizations Manager
- Enable and disable features
- Manage the agents for integrated devices
- Provision applications that can call the web API
- Configure API throttling settings
- View the operator audit trail
- Manage system jobs
- Purge ended alerts
- Manage SMS Opt-In
- Configure device gateways
- Configure devices overview
- Configure devices
- Enable and disable devices
- Set device delivery priority
- Add a device to the user details contact information
- Manage mass communication devices
- Mass device types and categories
- Create a mass device endpoint
- View and edit device details
- Configure Giant Voice devices
- Configure the AtHoc Connect organization network
- Manage the Cloud Services Gateway
- Configure RSS feed information for RSS and Atom content feeds
- Configure XML feed information for mass communication devices
- Configure failover delivery gateways
- Manage a TTY/TDD phone device
- Manage a pager device
- Configure desktop app settings
- BlackBerry AtHoc Customer Support Portal
- Documentation feedback
- Legal notice
Manage the hosted email service
- In the navigation bar, click
 .
. - In theDevicessection, clickDevices.
- On theDevicespage, on thePersonal Devicestab, click an email device.
- On the device details page, clickEdit.
- Modify the values in theDetailssection with names and information that are valid for your organization.
- In theContact Info Editfield, select who can edit contact information. The options areAll,None,End Users, andOperators.
- Optionally, selectUsers must provide contact info for this Device in Self Serviceif you want to require users to provide that information. If you do not select this option, providing the information will be optional.
- In theHelp Textsection, enter text that will appear on the screen when operators are creating an alert.You must be an Enterprise Administrator to edit the help text fields.
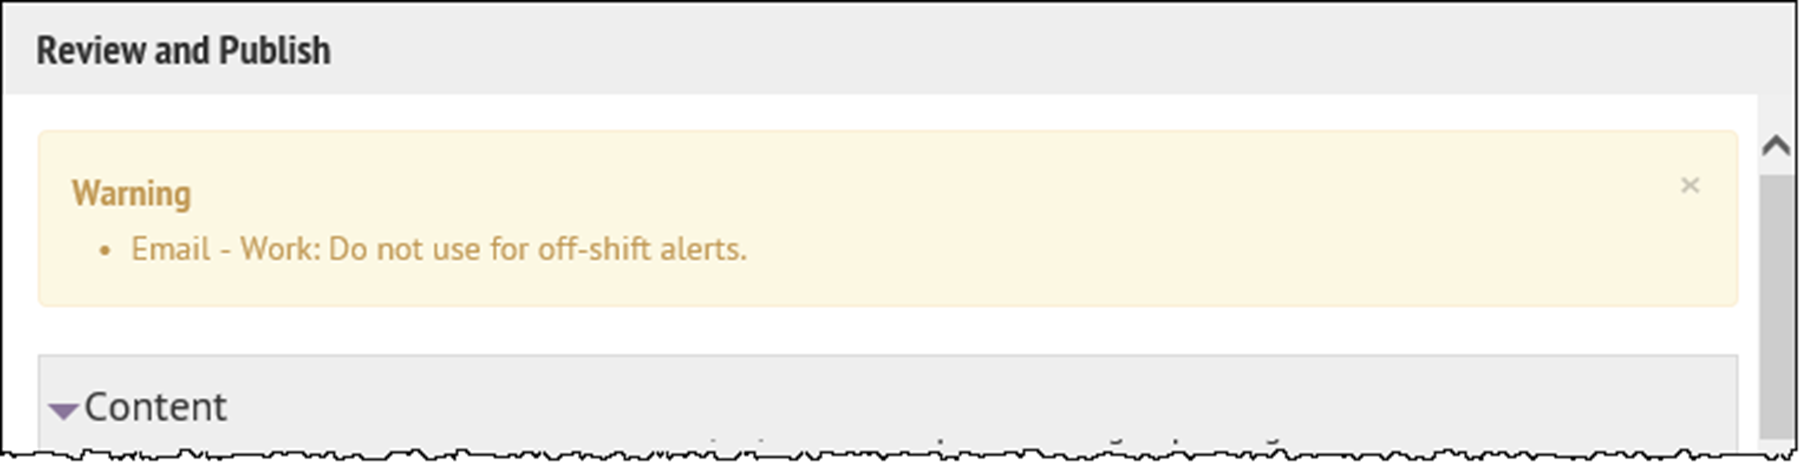
- Targeting Help Text: When the operator selects this device as a target, the text you enter in this field appears at the top of theReview and Publishscreen. For example, if the device is a work email account, you can enter, "Email - Work: Do not use for off-shift alerts" so that users know not to select the device if they are trying to contact people who are not at work.
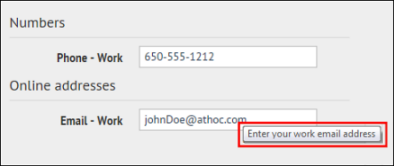
- Contact Info Help Text: The text you enter in this field appears under the device name on the End User details screen. The text should explain what should be entered in the field.
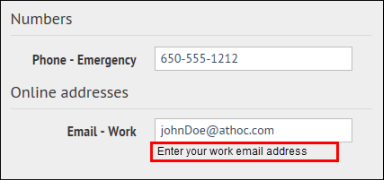
- Contact Info Tool Tip: The text you enter in this field appears as a pop-up tool tip when the user hovers the cursor over the device name on the End User details screen. The text should explain what should be entered in the field.
- In theDelivery Gatewaysection, clickAdd a Delivery Gatewayand then selectAtHoc Cloud Delivery Service GatewayorOEM Cloud Delivery Service, either East or West, based on the informationBlackBerry AtHoccustomer support has provided.
- ClickSave.
- If you are ready to make the device available for alert publishing, clickMore Actions>Enable.
The device is available for alert publishing.