Select an alert or event location
There are two ways to add locations to an alert or event using the publisher map:
- Define custom locations by drawing shapes on the map in the alert or event template to target users.
- Select shapes of predefined selectable layers when creating an alert or event.
You can add a location by selecting the
By Advanced Query
tab in the alert or event template. This enables you to target users by specific geolocation attributes.When selecting an alert or event location, users and organizations are targeted when they appear in a shape layer. Shape layers pick up location attributes, connected organizations, and the last known location of mobile app users. Users can be targeted inside a shape layer if they have a last known location or a location attribute.
- In theContentsection of an alert template, or in theEvent Detailssection of an event template, clickAddin theLocationsection.
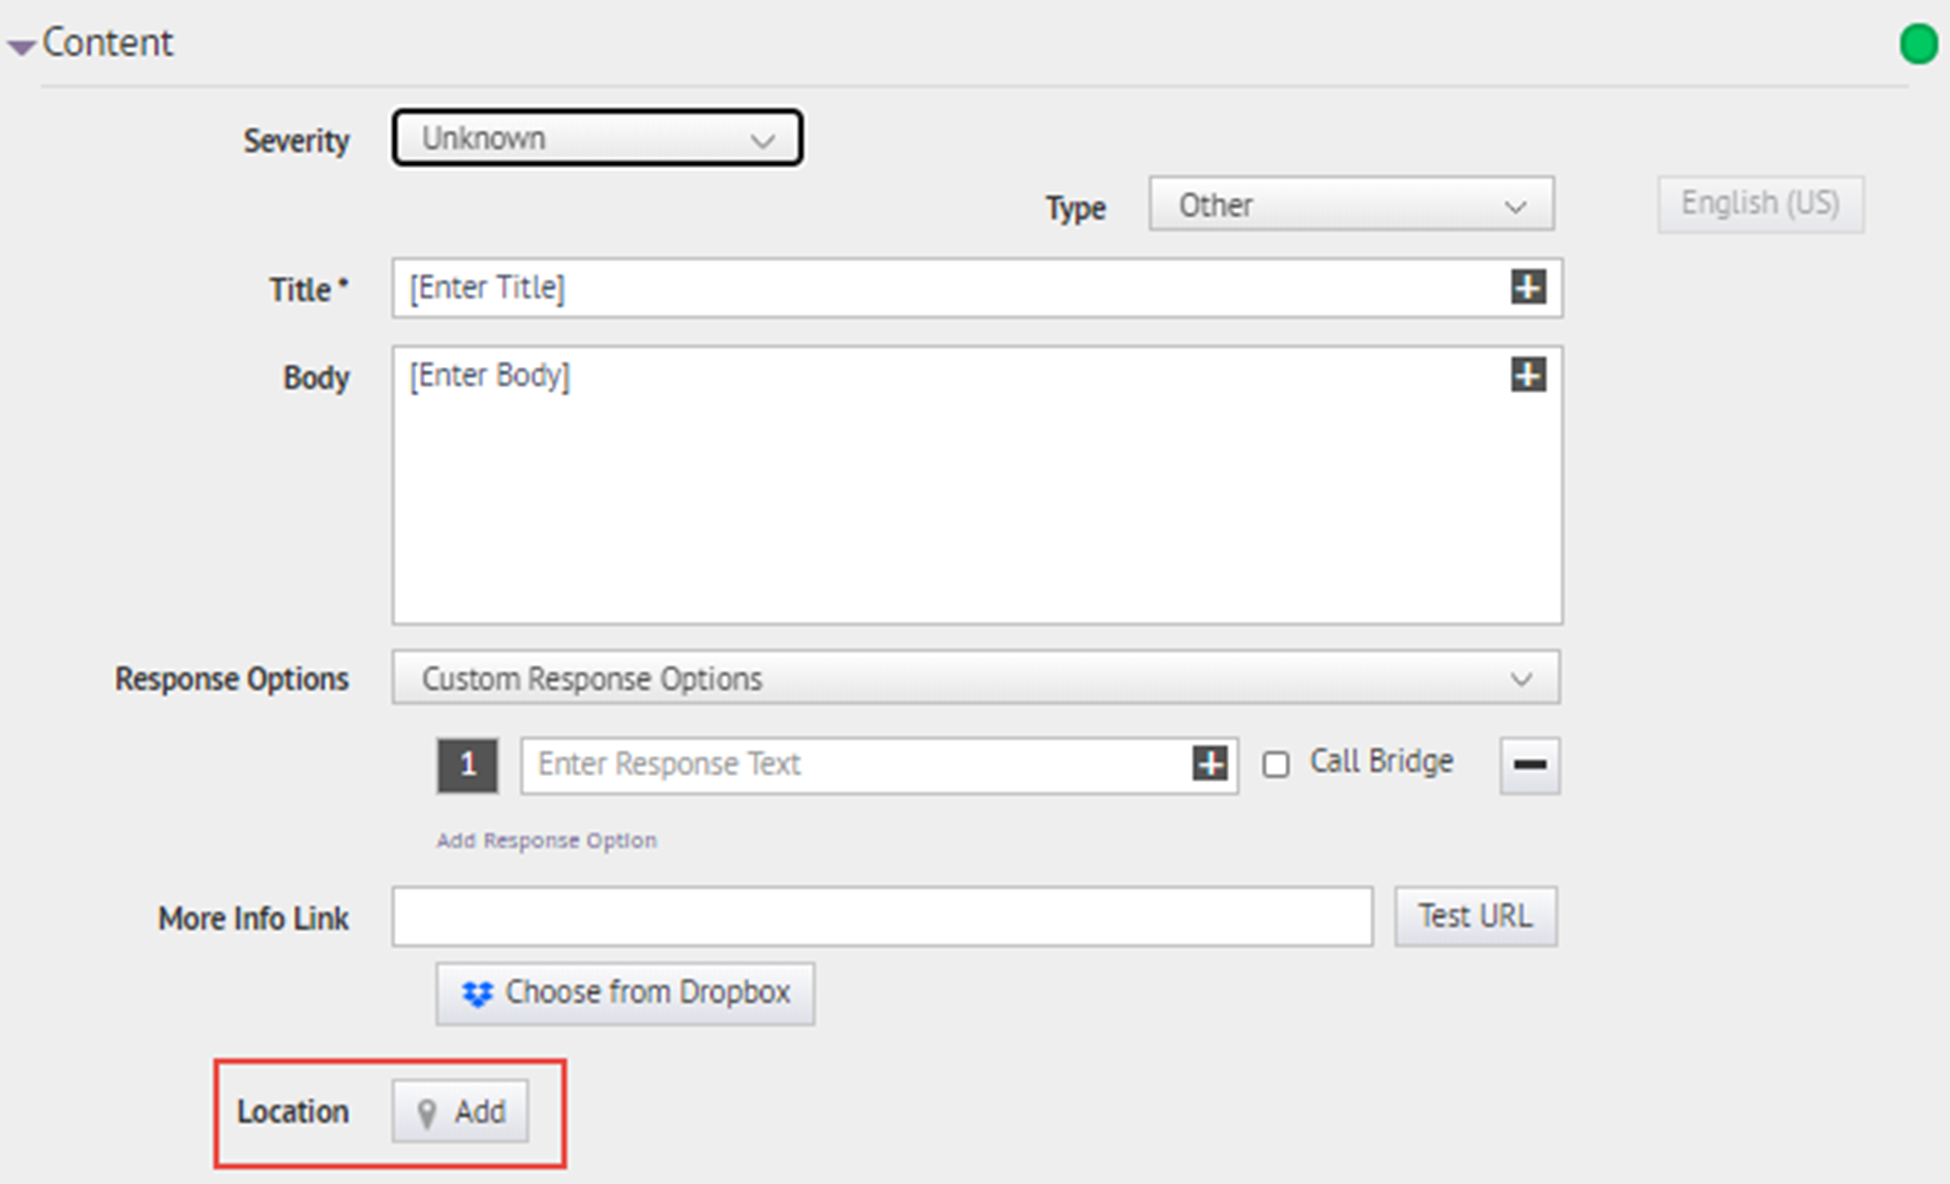 The publisher map opens.If you have the necessary permissions, you can set the default map area in the Map Settings screen. For more information, see Configuration and Setup.
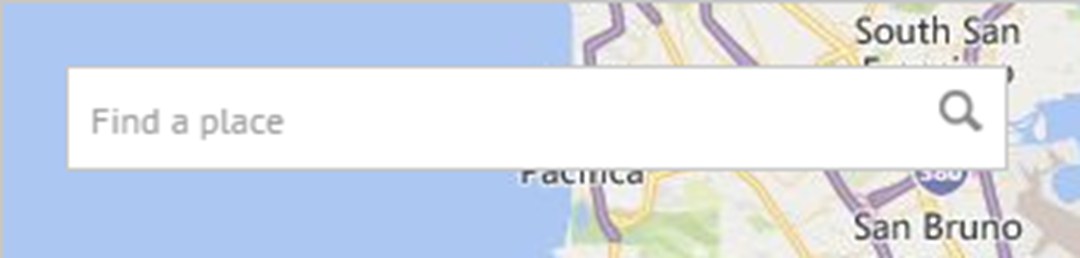
 - Optionally, if the location you want to target is not displayed on the current map, enter the address, point of interest, or longitude/latitude value pair in theFind a placefield. PressEnteron your keyboard to refresh the map location.
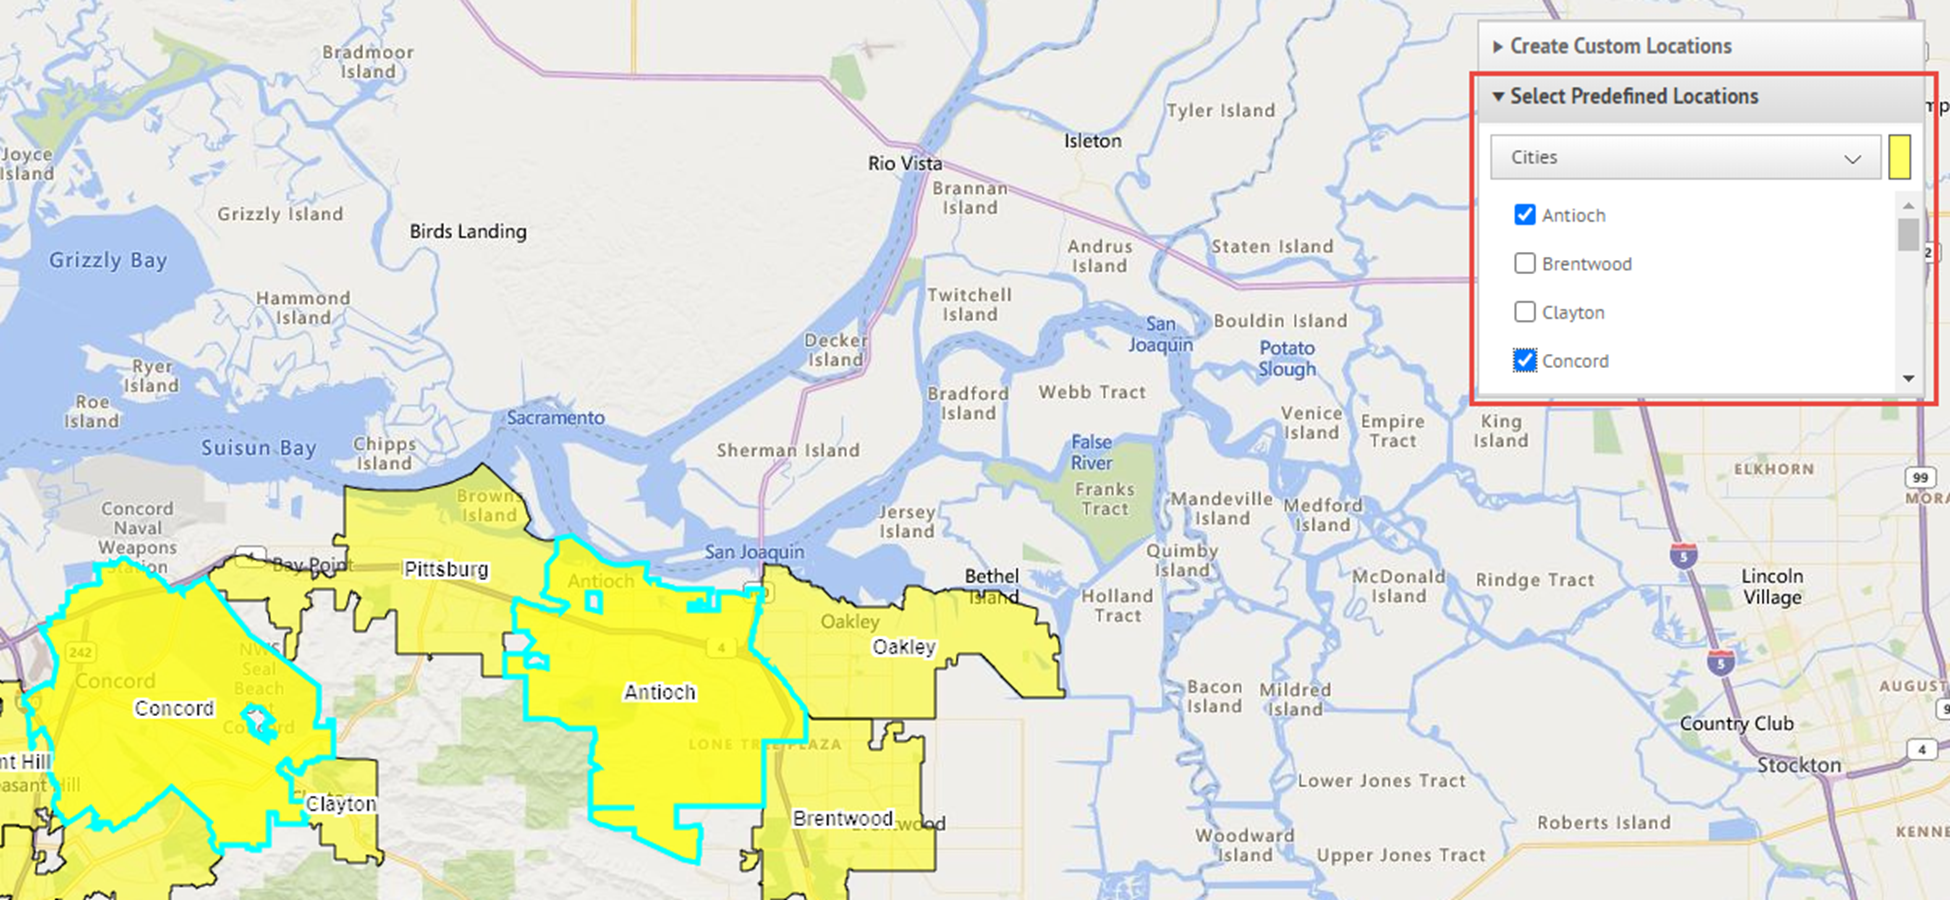
- To use a predefined location on the map as a targeting criteria, clickSelect Predefined Locationsto access a drop-down menu where you can select any predefined layers. When you select a layer, the map updates automatically to display the layer location on the map.Shape layers must be made selectable in the Map Settings. For more information, see Shape layers.Uploading multiple layers with different sets of predefined locations is recommended to improve usability and system performance. Shape layers are configured on the Map Settings screen. Administrators can access them atSettings>Basic>Map Settings. For more information, see Shape layers.
- Select one or more predefined locations within the layer by clicking them on the map or selecting the check box beside their names in the drop-down menu. As you make selections, the locations are highlighted on the map.
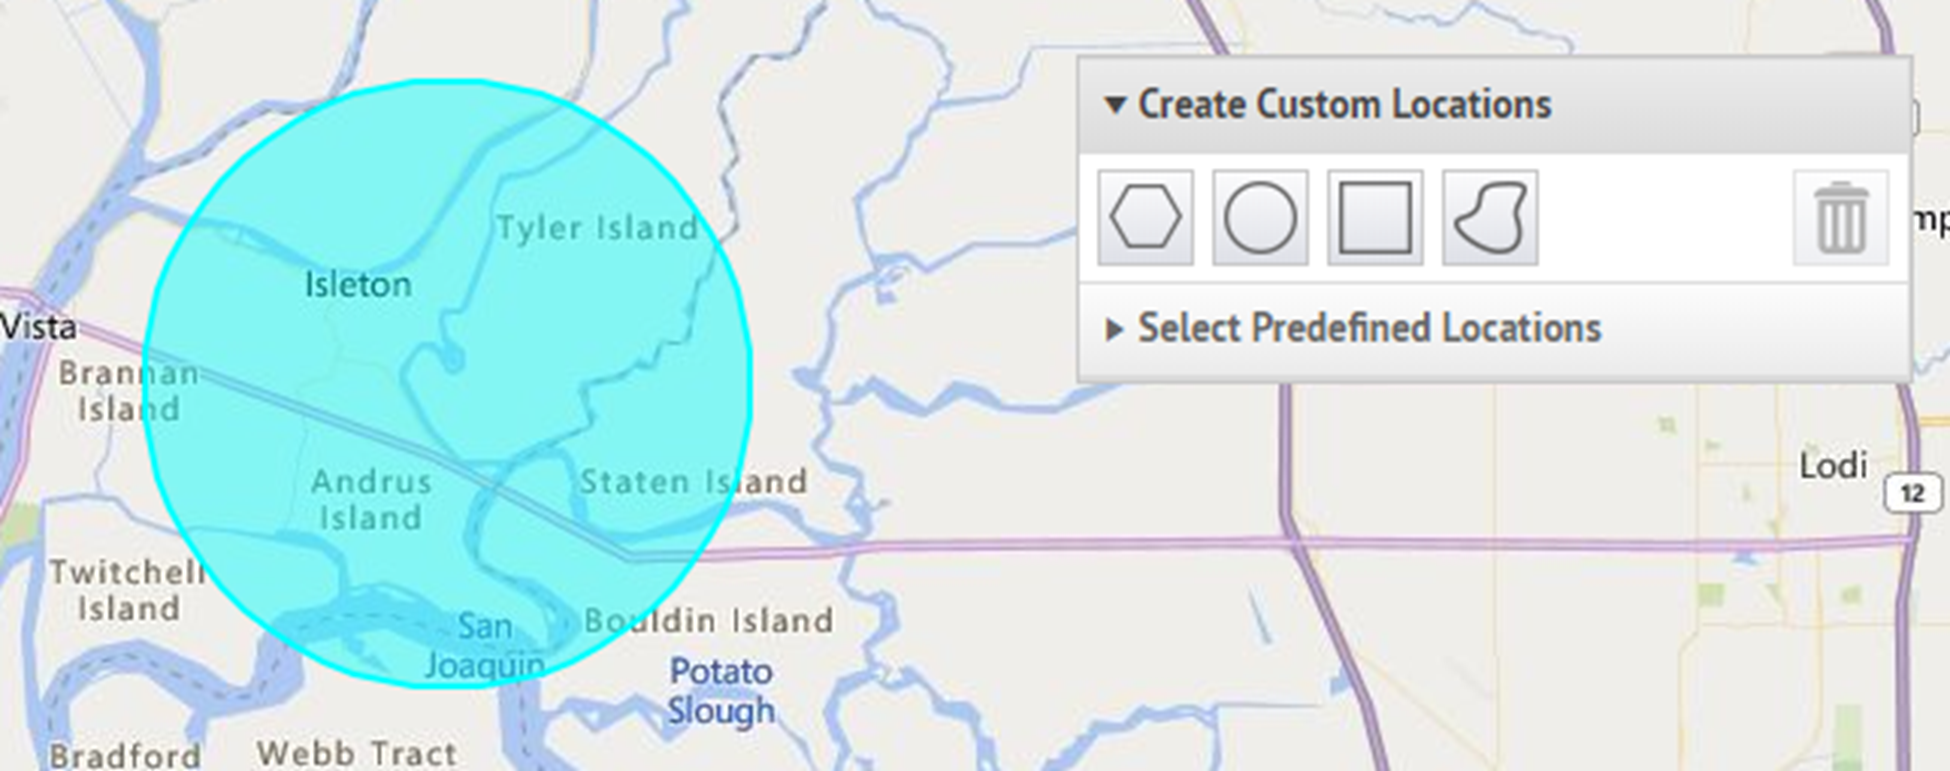
- To create a custom location, clickCreate Custom Locationsto display the drawing tools for creating shapes.
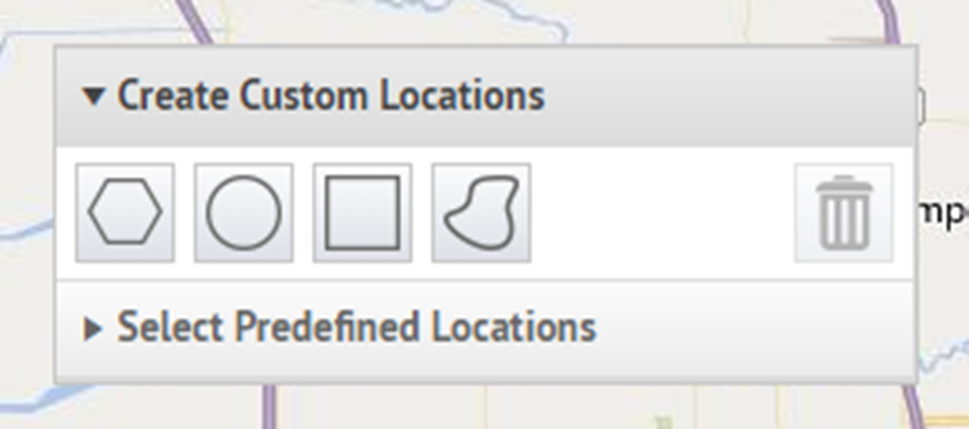
- Click one of the shape buttons in the Create Custom Locations toolbar and click and drag on the screen to cover the location you want to use in the alert or event.
- To view the size of a custom location, click the shape on the map. A black box appears beside the Create Custom Locations button, listing the total area of the custom location in square miles or square kilometers, depending on which unit of measurement your system uses.
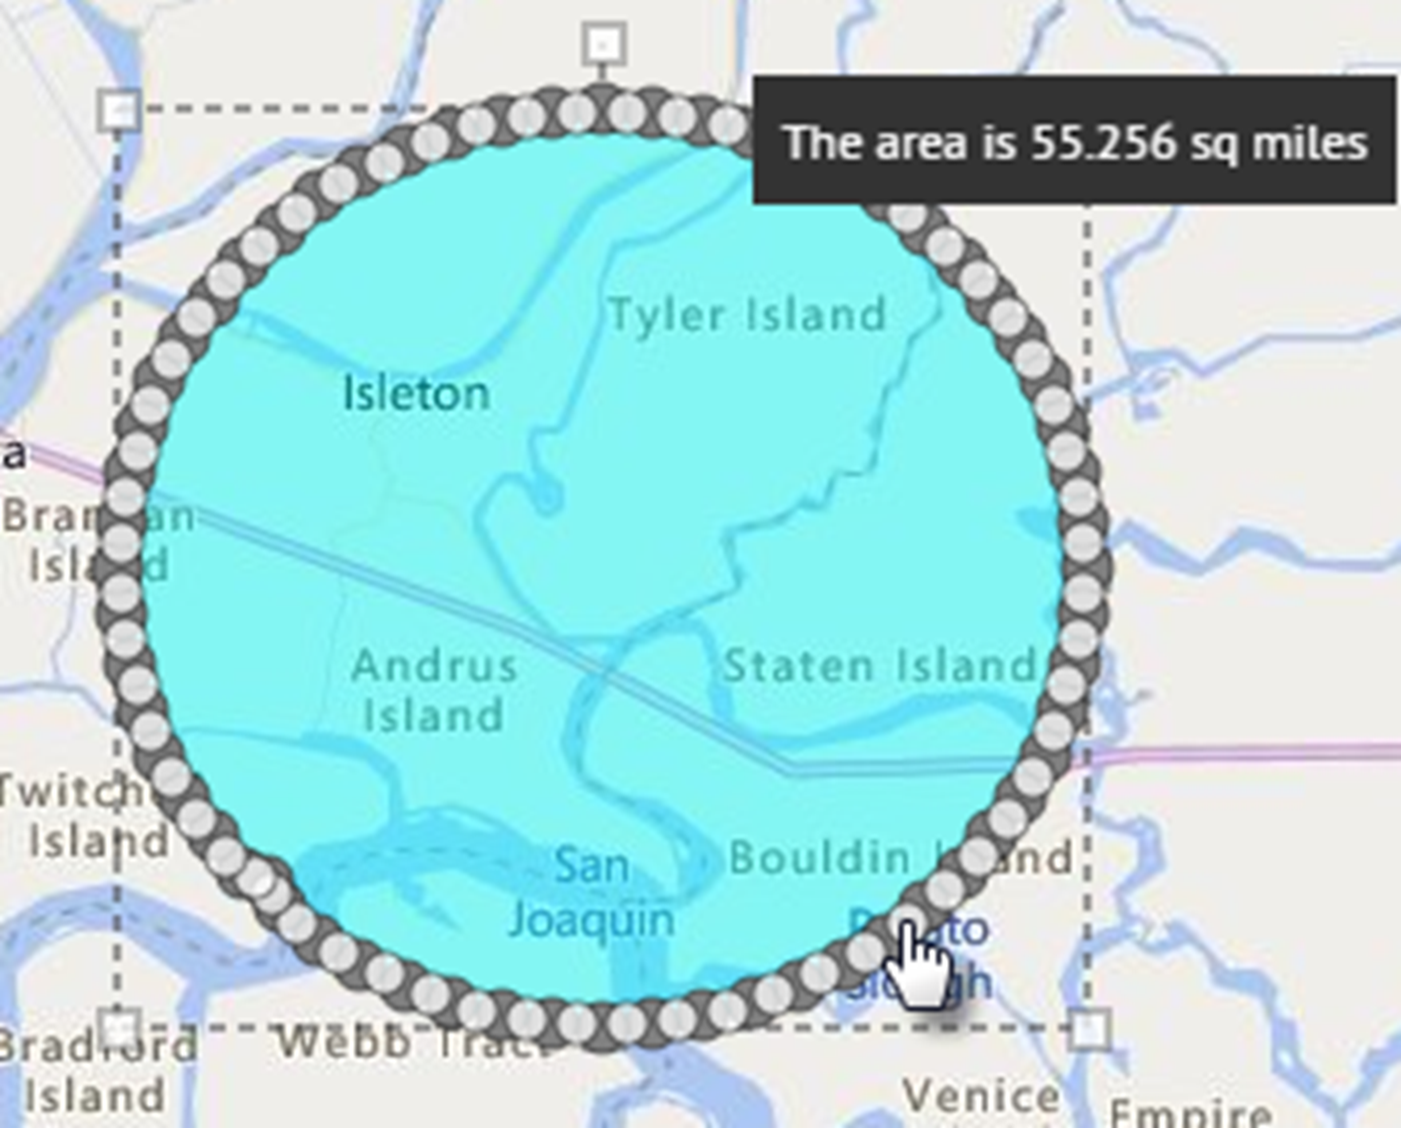
- To edit a custom location, click the shape and then click and drag on any of the circles that appear around the edge of the shape.
- To scale new shapes up and down while preserving their dimensions, complete the following steps:
- Press and hold the SHIFT key on your keyboard.
- Click and release the shape to select it.
- Move your cursor over one of the white squares around the shape.
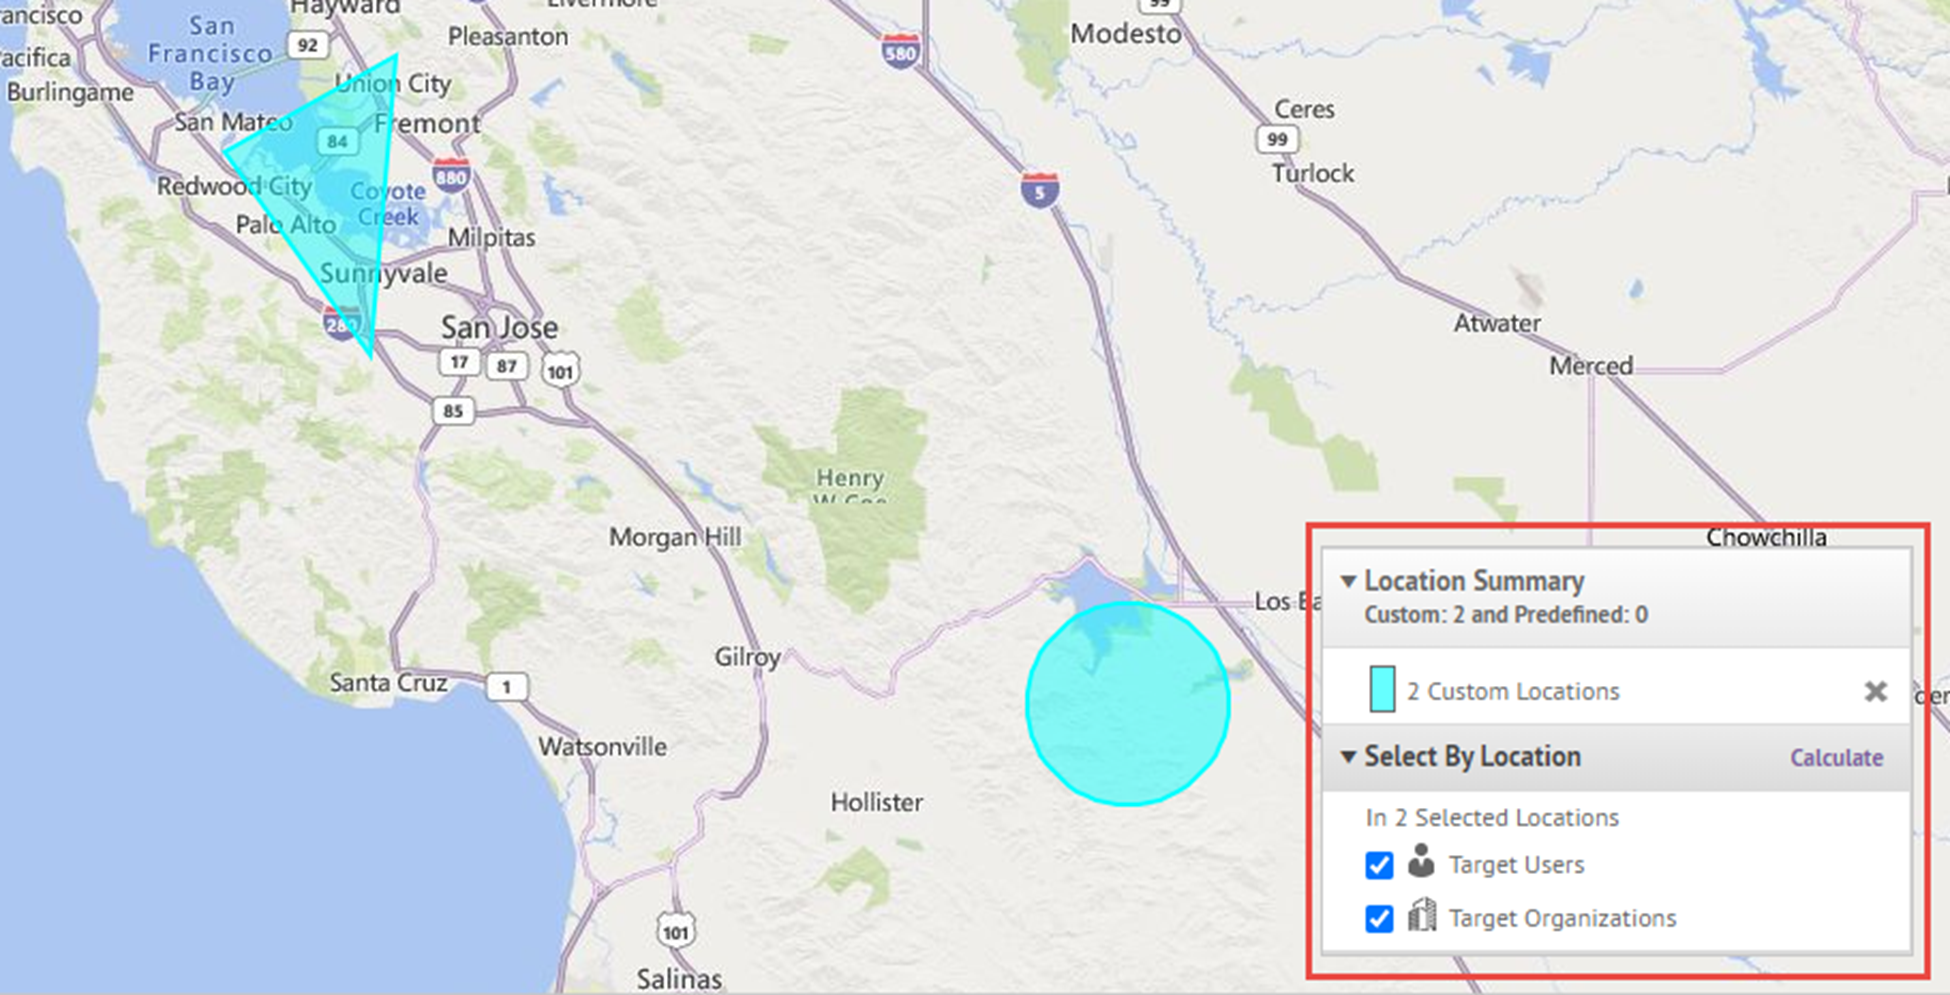
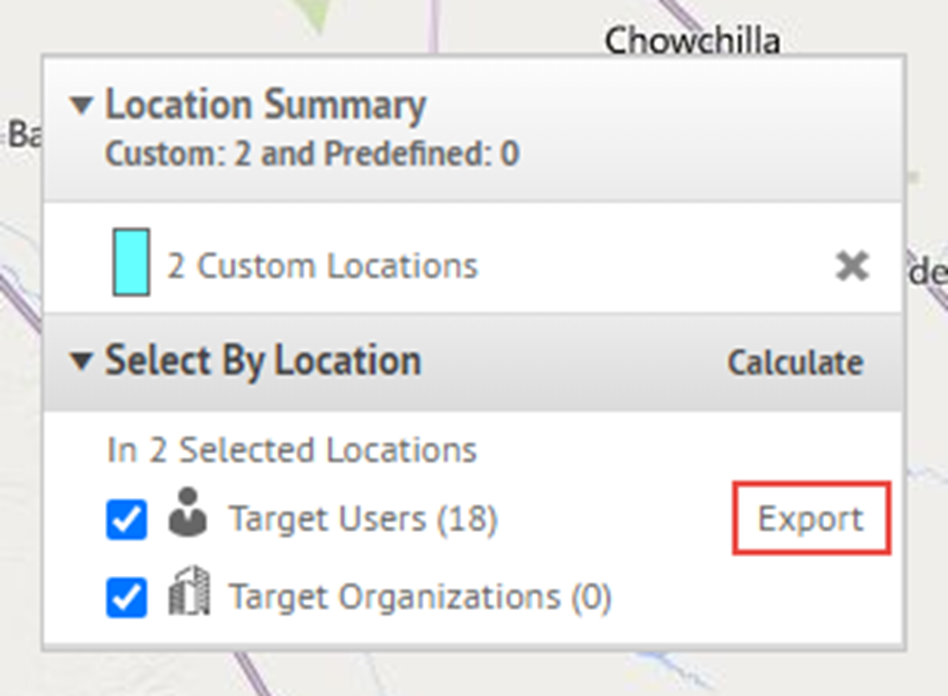
- Click and hold on the white box while dragging the mouse to increase or decrease the shape size.As you create shapes and select predefined locations on the map, theLocation Summaryfield in the bottom-right corner updates to provide you with an overview of the total number of locations that are displayed on the map and the locations that will be included in the alert or event.
- To delete the custom locations you created, in theLocation Summarysection, click theXbeside the custom locations.
- To delete a single custom location, click the border of the location shape on the map to select it, then click
 on the Create Custom Locations toolbar.
 - To view the total number of users and organizations that are located within the selected map locations, clickCalculatenext to theSelect By Locationfield.
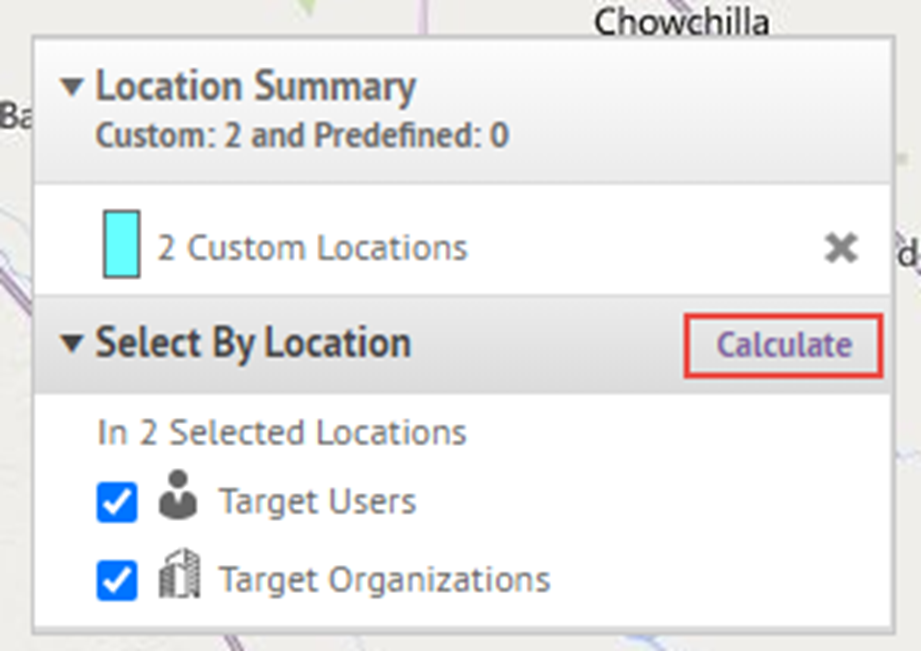 Users and organizations listed in the Select By Location field are automatically added to the alert or event target list. To remove them as targets, deselectTarget UsersandTarget Organizations. For more information, see Target users by location in alerts and Target affected users by location in accountability events.
 - Optionally, in theSelect by Locationsection, clickExportto export the targeted users or organizations.
- On theExport Optionsscreen, select the columns to export in the left column and clickAdd.
- Optionally, use the control buttons on the right to order the selected columns.
- ClickExport PDForExport CSV. The .pdf or .csv file downloads to your system.
- ClickCancelto close theExport Optionsscreen.
- When you are done adding locations and targeting users and organizations, clickApply.