Validate your shape file using QGIS
To ensure your shape file is correctly formatted to meet all requirements, you can validate it using desktop software such as ArcGIS, or open source software such as QGIS.
- Open QGIS.
- ClickLayers>Add Layer>Add Vector Layer.
- ClickSourceand select the shape file or zipped shape file. The shape .zip file must contain the .shp, .dbf, and .prj files. The shape .zip file can also contain a .shx file that is used to increase the performance of the shape file, but it is not required. If the shape .zip file does not include the required files, the import stops and an error is displayed.
- Selectfilefor Source Type.
- SelectUTF-8for encoding.
- ClickAdd.
- ClickLayers.
- Right-click the new layer.
- In the menu that appears, clickProperties.
- ClickInformation.
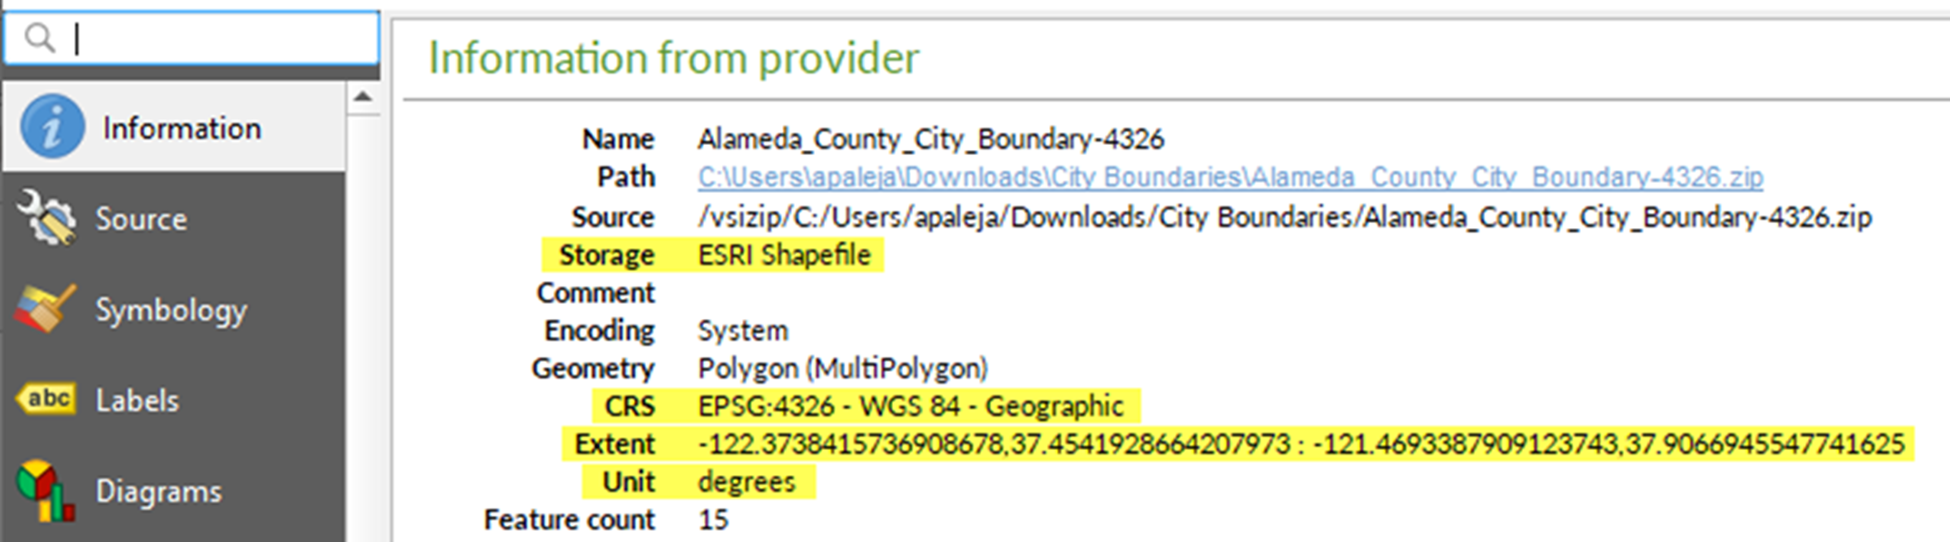
- In theInformation from providersection, verify the following values:
- Storage: ESRI Shapefile
- CRS: EPSG:4326 - WGS 84 - Geographic
- Extent: should be within the range of -180.00, -90.00, 180.00, 90.00
- Unit: degrees
If your shape file does not display the correct values in the Information from provider section, Convert projection of shape file using QGIS.