View users in drawn shapes
Operators with alert publishing permissions can use the Shape Toolbox on the live map to draw shapes, view the number of users in the shape, and target them in alerts. Click a shape button on the Shape Toolbox panel and click and drag on the screen to draw a shape on the live map.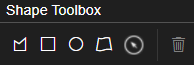
As you create shapes on the live map, the number of unique users in that area are displayed in the center of the shape. If you move the shape to another location on the map, the number of users is recalculated. If you are accessing the live map from an enterprise organization, the number of users displayed in the shape includes users in the enterprise and its suborganizations.
You can draw multiple shapes on the live map.
Click and drag a shape to move it. To edit a shape, click the shape and then click and drag on any of the circles that appear around the edge of the shape. To delete a shape, select it and click  or press
or press Delete
on your keyboard.When you draw a shape on the map, the User Action panel opens. The Users tab of the User Actions panel displays the number of unique users found in the shapes drawn on the map. The number of available users ( ) and blocked users (
 ) that are available for alert targeting are displayed. Organizations with users in the drawn shapes are displayed in the Organization Filters section. If there is an enterprise organization and suborganizations, the enterprise organization is listed first.
) and blocked users (Select filters in the Organization Filters, Attribute Filters, and Shape Selection by Layer sections to filter the targeted users in the drawn shapes by organization or geolocation attribute. All geolocation attributes for an organization are available as filters. You can filter users by a timeframe of when their Last Known Location attribute was last updated. Select the number of minutes, hours, or days.
As you select filters, the number of targetable users updates automatically. Click the
x
Users
link to view the list of targeted and blocked users. On the User Selections
dialog you can:
- Use theSearchfield to find specific users.
- SelectBlocked usersorTargeted usersfrom theAll userspull-down list to filter the targeted users.
- Block or unblock individual users.
Click
Apply
to save and view the updated user selections.After you have selected your targeted and blocked users, you can Export users from the User Action panel or Publish a quick alert from the live map.