Before you begin, review the hardware requirements for the connector, and ensure that you have permissions to deploy a VHD file and to create a connector image.
1. Download the CylanceGATEWAY Connector VHD file
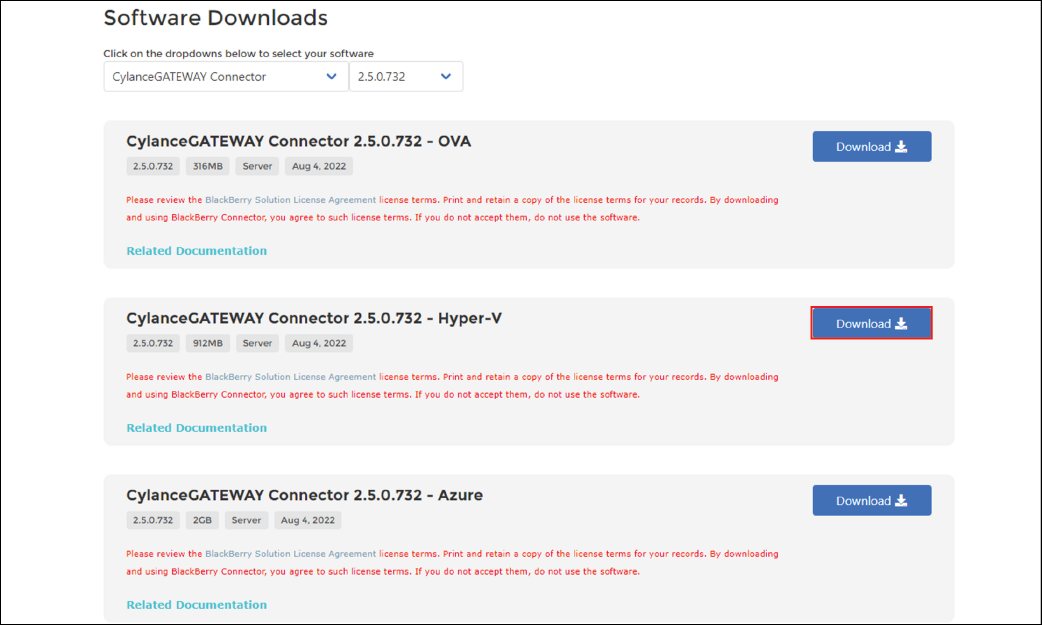
You can download the cylance-gateway-connector-dynamic<version>.vhd file from myAccount.
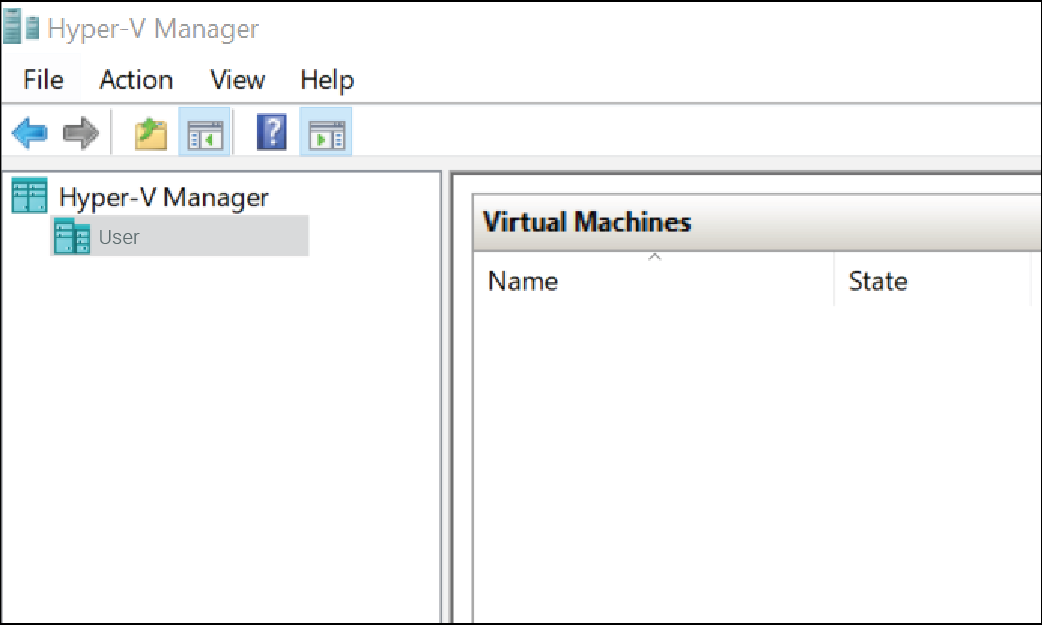
2. Run Hyper-V Manager as an administrator
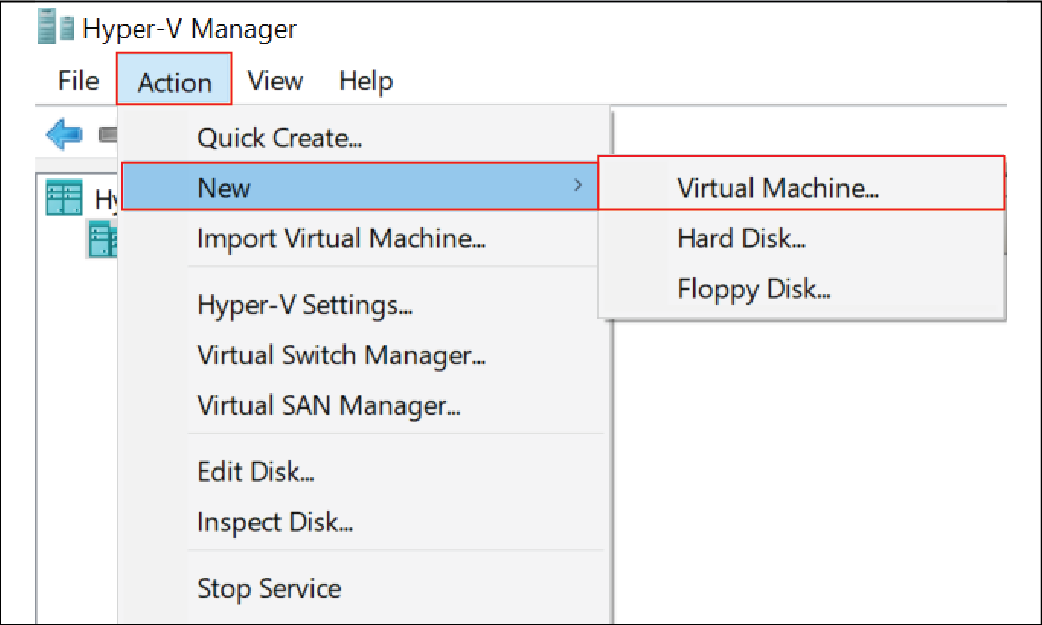
3. Click Action > New > Virtual Machine
In the New Virtual Machine wizard, click Next.
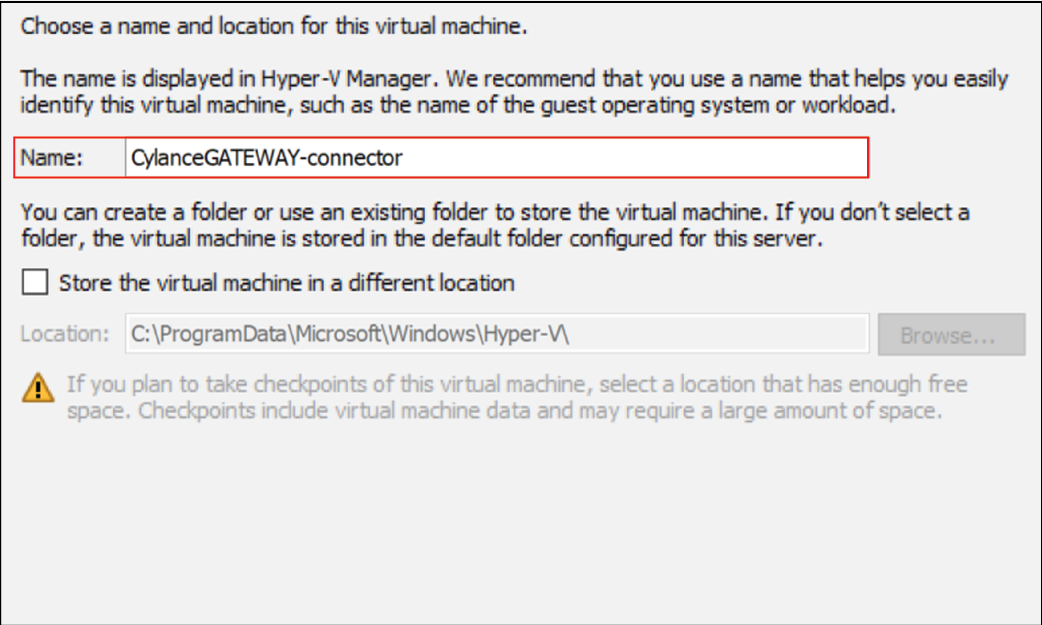
4. Specify a name for the VM
Click Next.
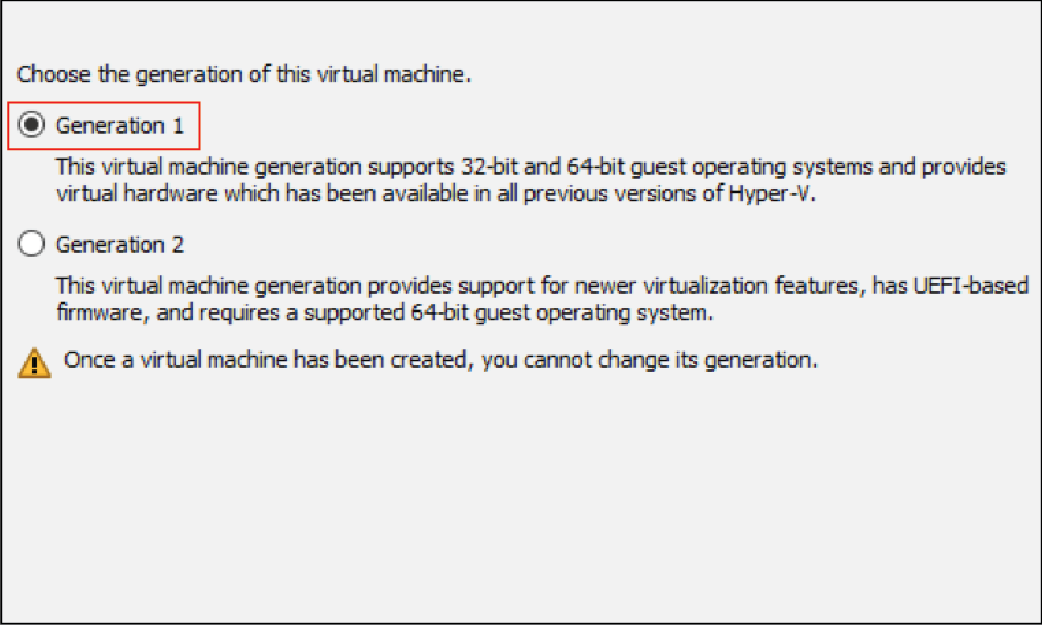
5. Select Generation 1
Click Next.
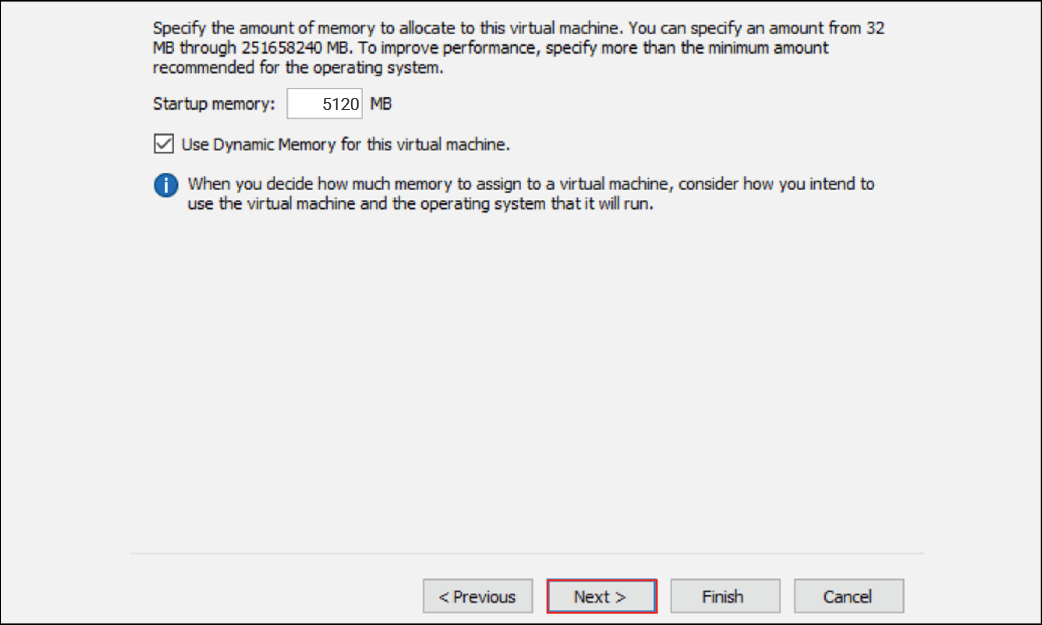
6. Assign memory to the VM
The CylanceGATEWAY Connector requires a minimum of 5 GB memory.
Click Next.
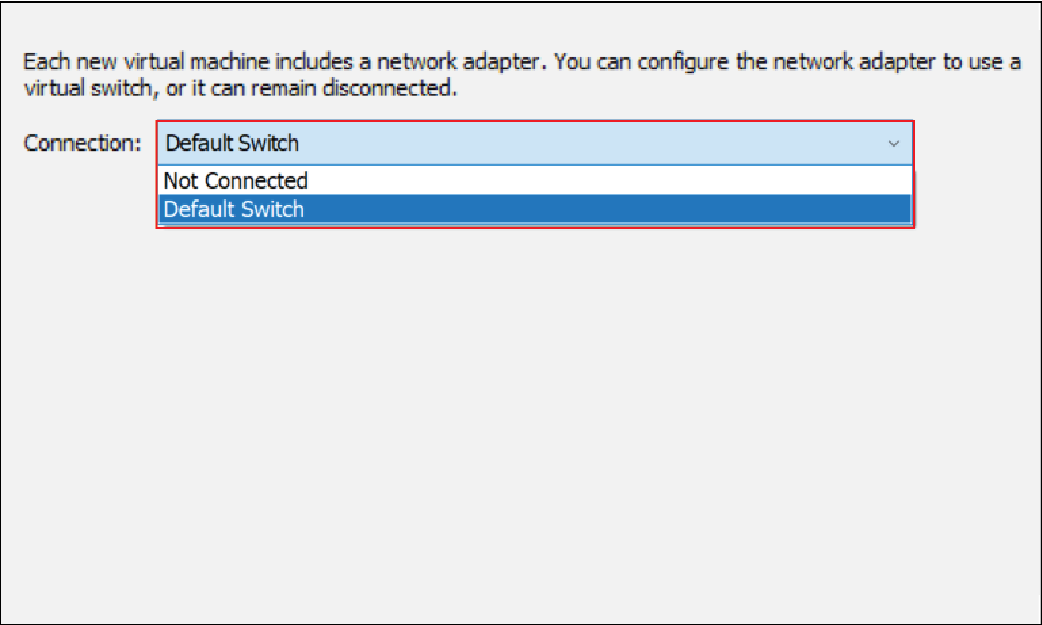
7. Select the appropriate connection
Click Next.
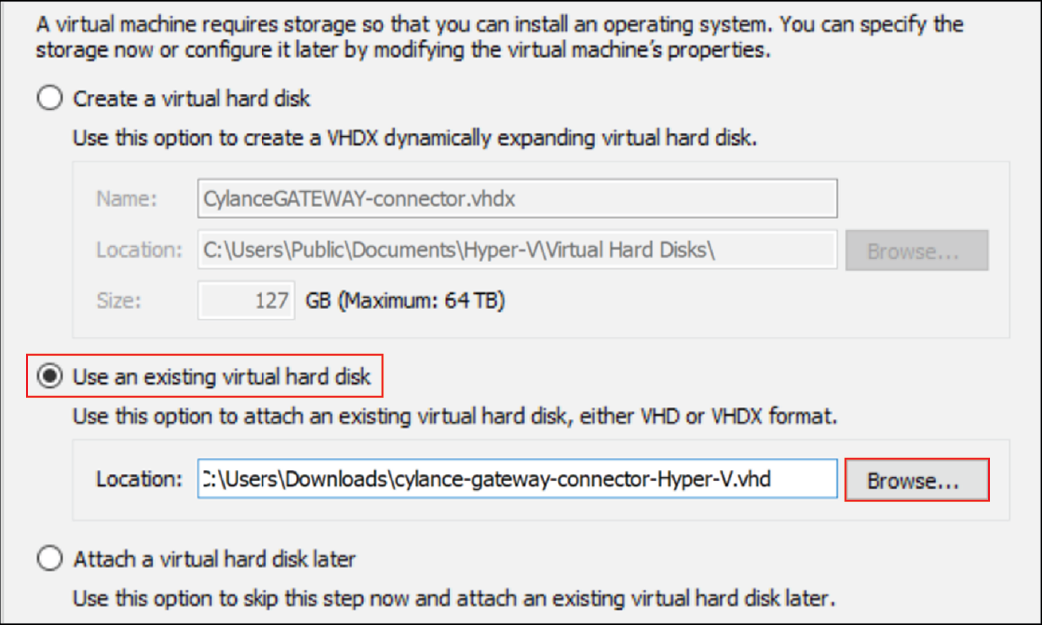
8. Add the downloaded VHD file
Select the Use an existing virtual hard disk option and navigate to the VHD file that you downloaded.
Click Next.
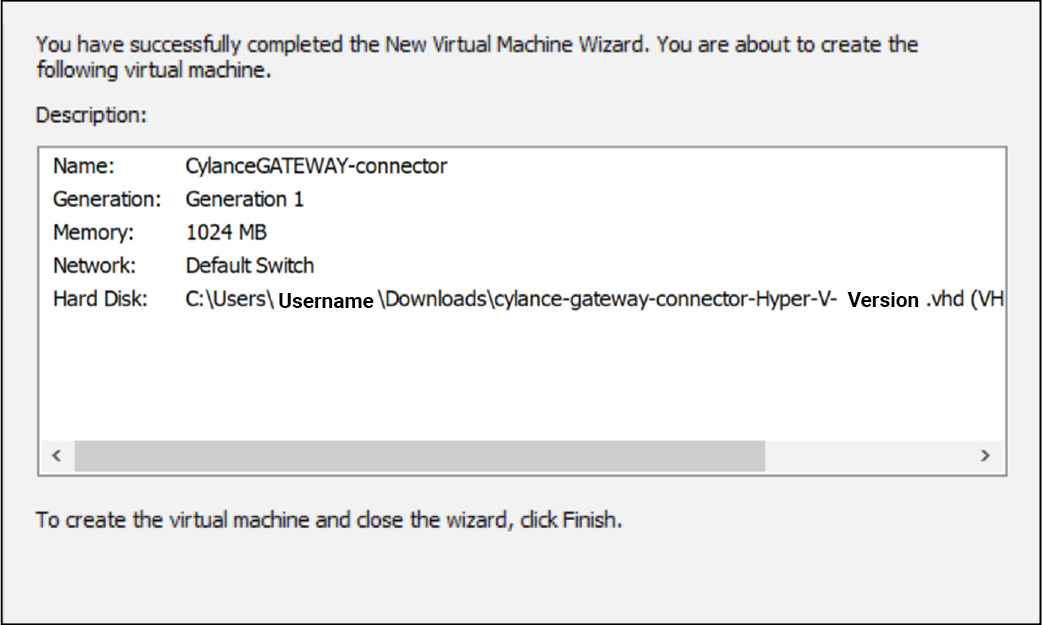
9. Review the configuration settings
After you review the configuration settings, click Finish.
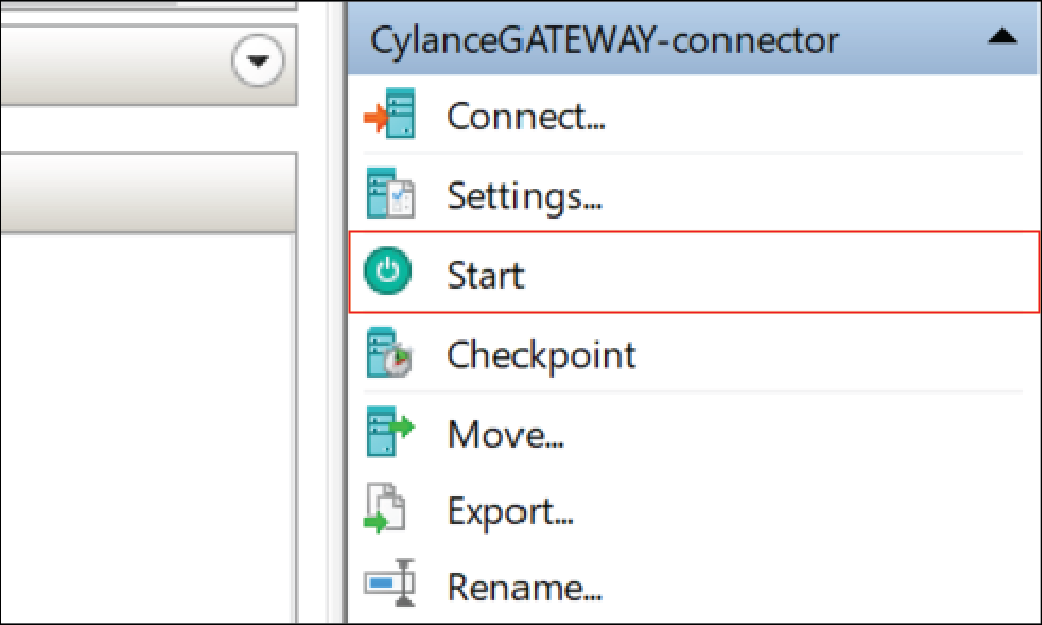
10. Start the connector
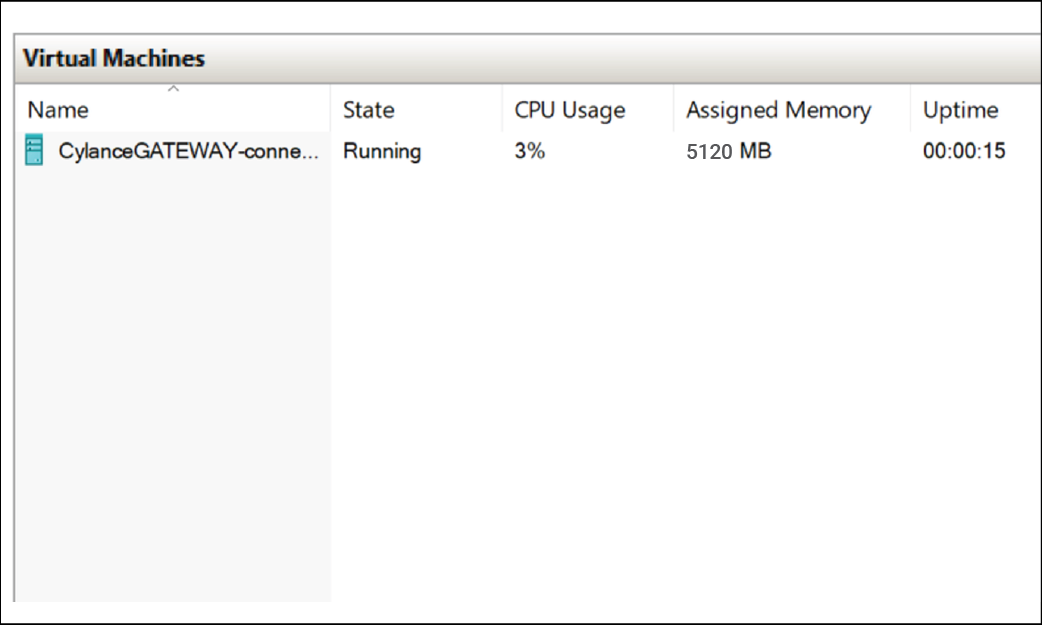
That's it!
You have successfully installed the CylanceGATEWAY Connector to your Hyper-V environment.
For instructions on how to verify that the VHD file is installed correctly in the virtual environment, see Configure the CylanceGATEWAY Connector in the VM environment.
After you install the CylanceGATEWAY Connector to your Hyper-V environment, you must configure your firewall and enroll the CylanceGATEWAY Connector with the BlackBerry Infrastructure. For more information about setting up the CylanceGATEWAY Connector, see Setting up the CylanceGATEWAY Connector.