The new Alerts view collects alerts from multiple Cylance Endpoint Security services and groups them by logical criteria to make them easier to review, investigate, and resolve. For the latest information about the types of alerts currently supported by the Alerts view, see the Cylance Endpoint Security Administration Guide.
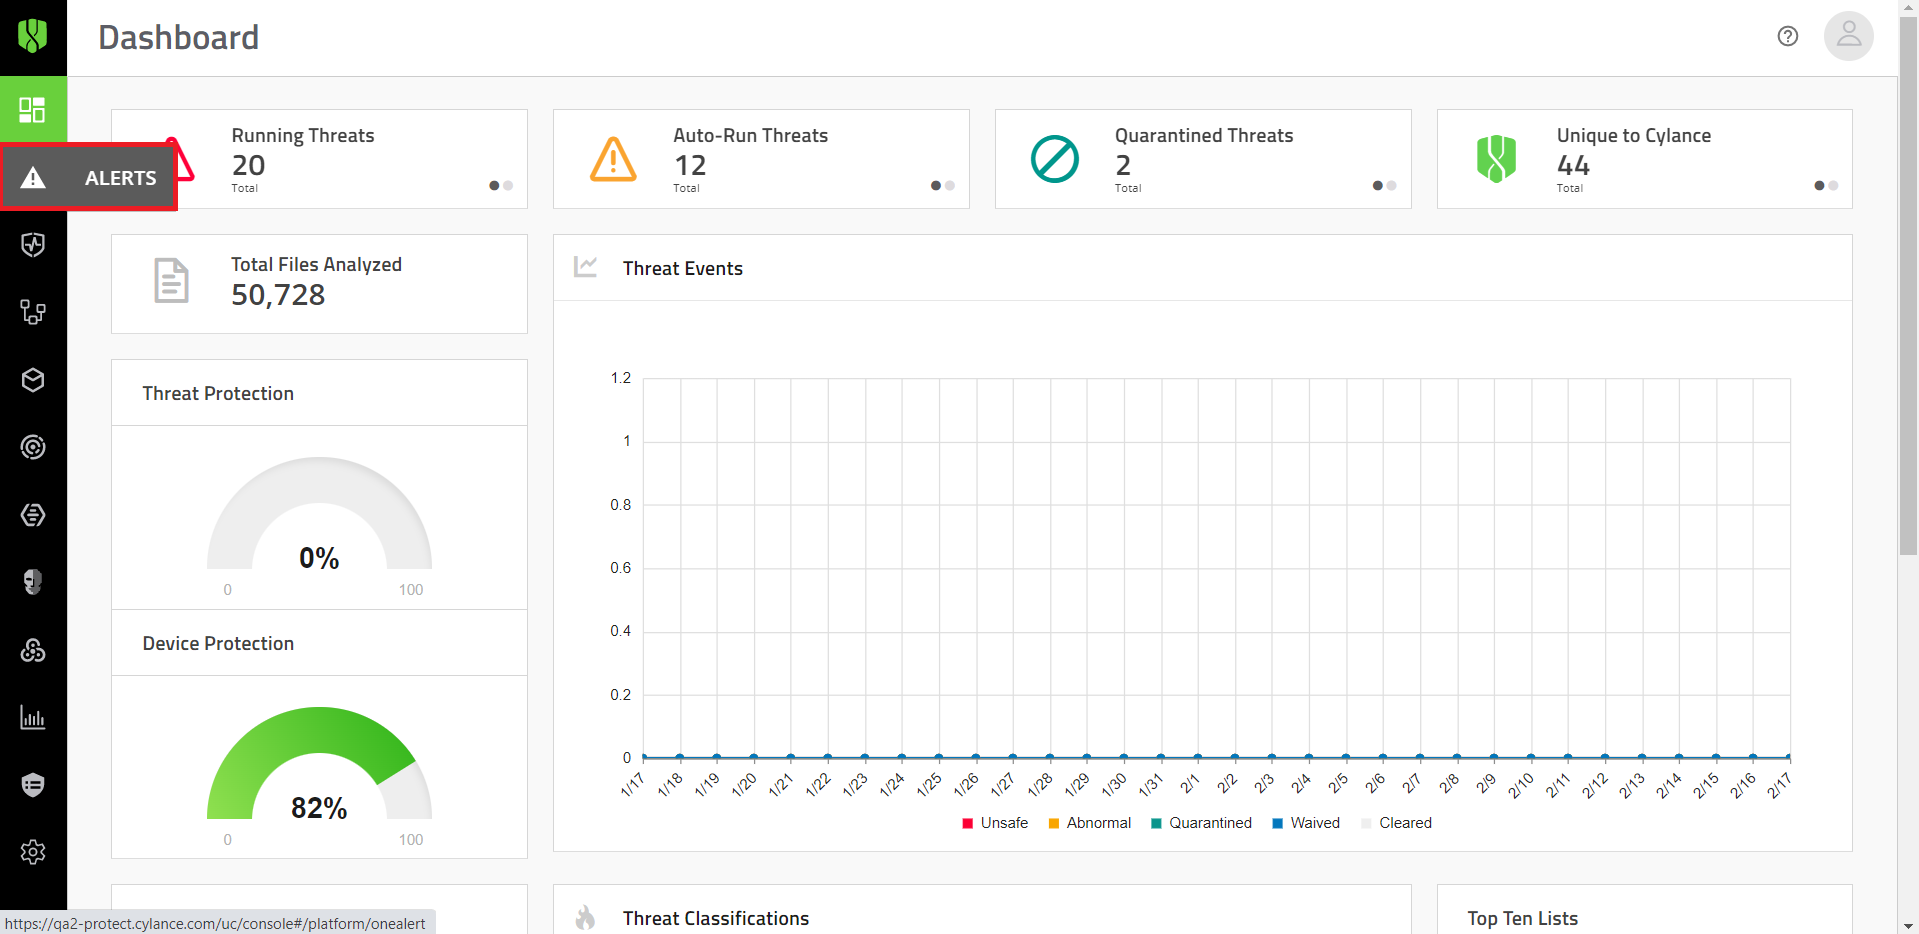
1. In the management console, click Alerts
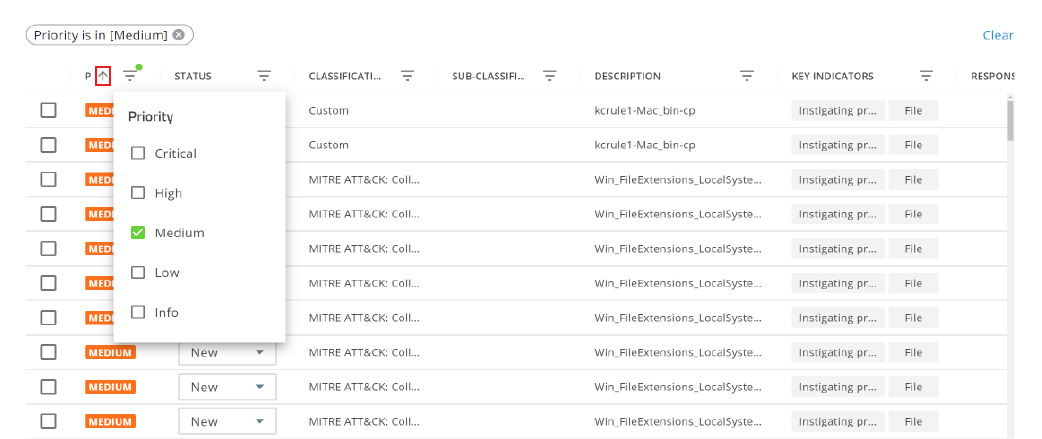
2. Filter alert groups
Click the filter icon next to a column heading and type or select the filter criteria.
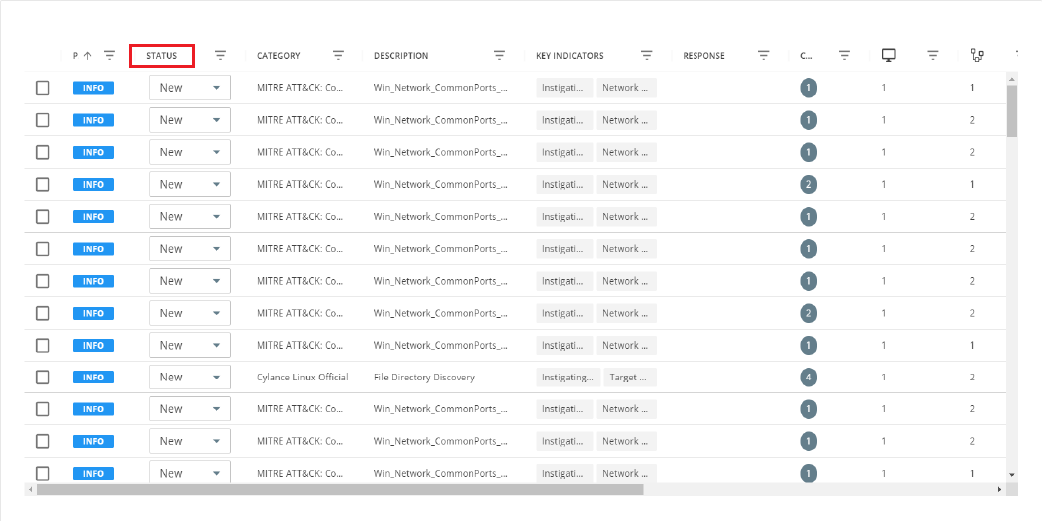
3. Sort alert groups
Click the name of a column to sort alert groups in ascending or descending order.
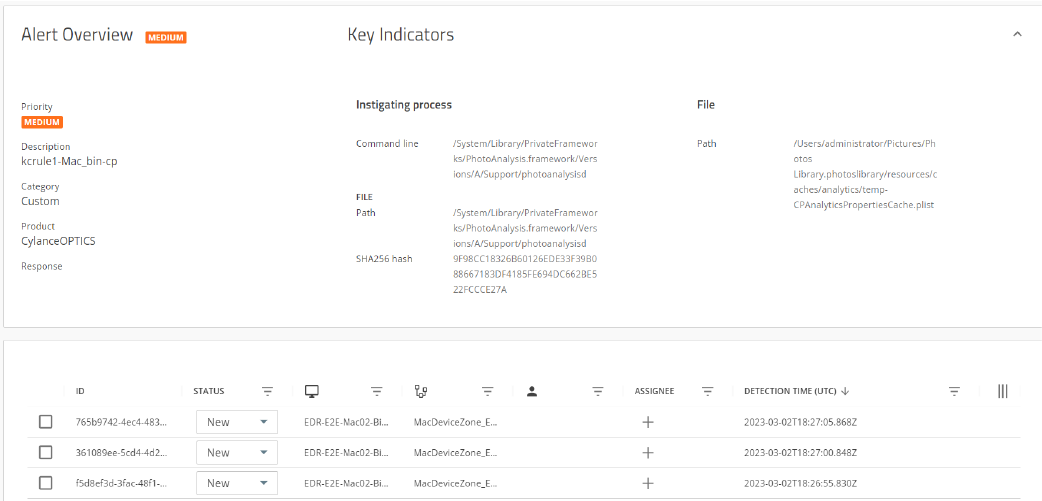
4. Click an alert group
In the alert group, you can view more details and see the individual alerts in the group.
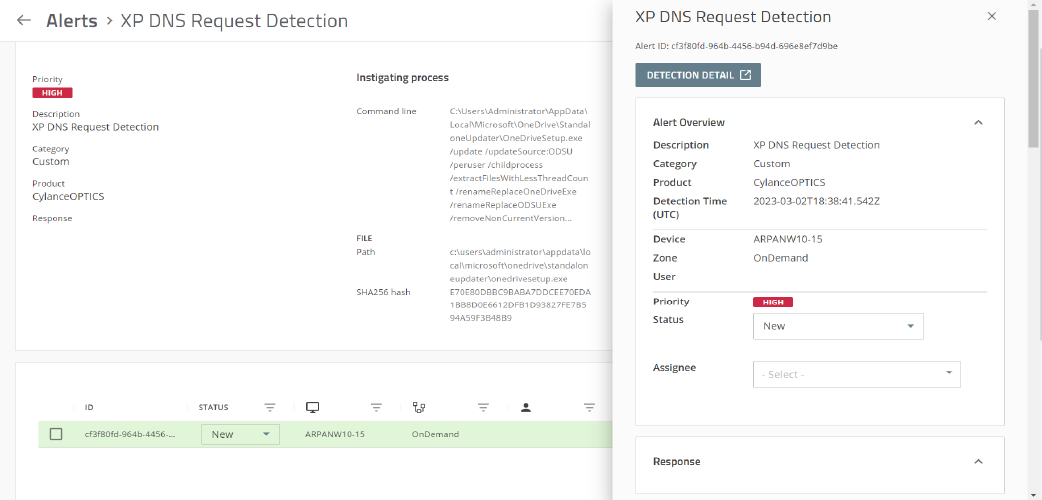
5. Review individual alerts
For individual device alerts, you can:
- Sort and filter the information
- Change the status of an alert
- Assign an alert to a user
- Add or change labels
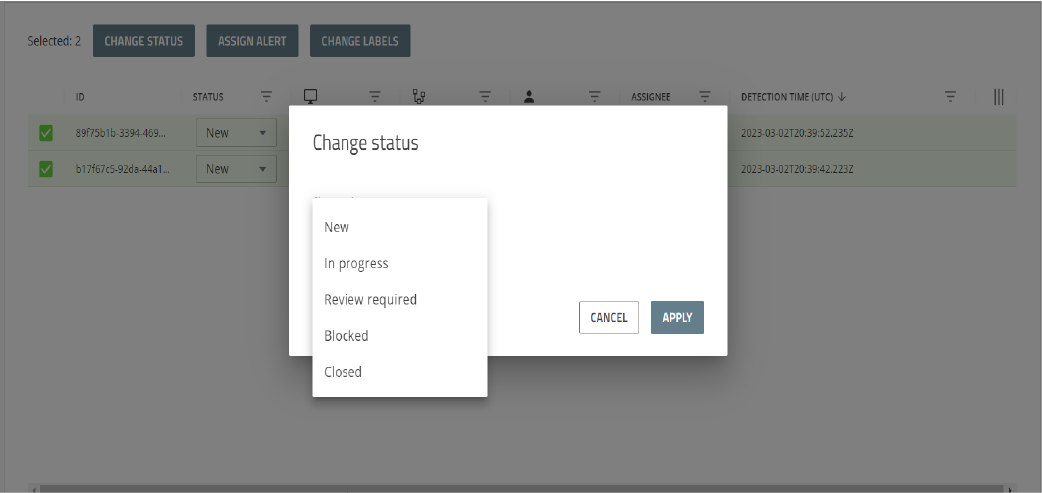
6. Change the status of alert groups
Select alert groups then click Change Status.
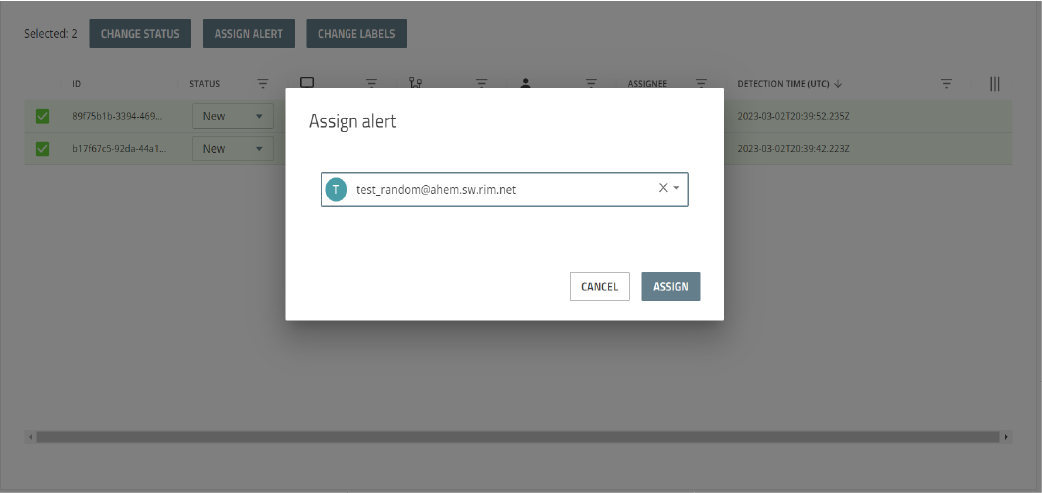
7. Assign alert groups to a user
Select one or more alert groups, click Assign Alert, and select the user that you want to assign it to for investigation.
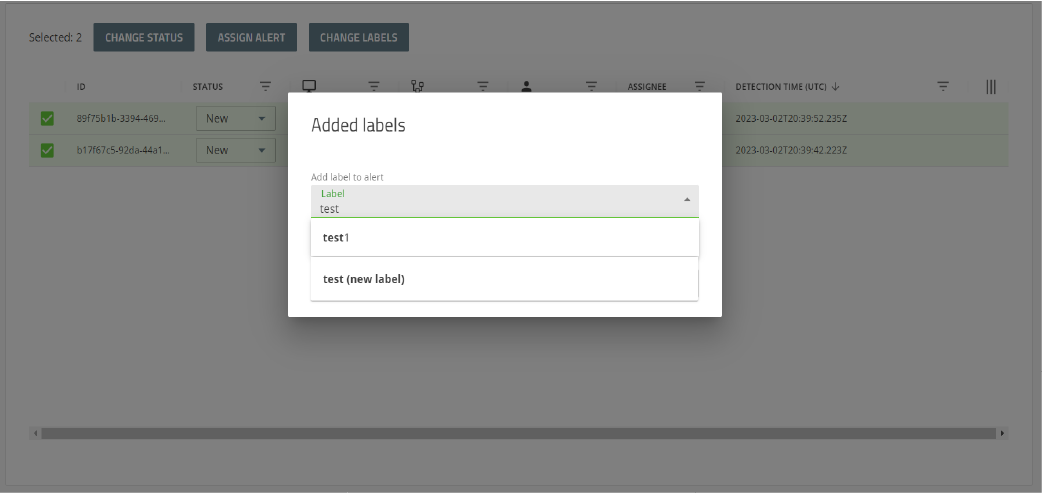
8. Add a label to an alert group
Select one or more alert groups and click Change Labels.
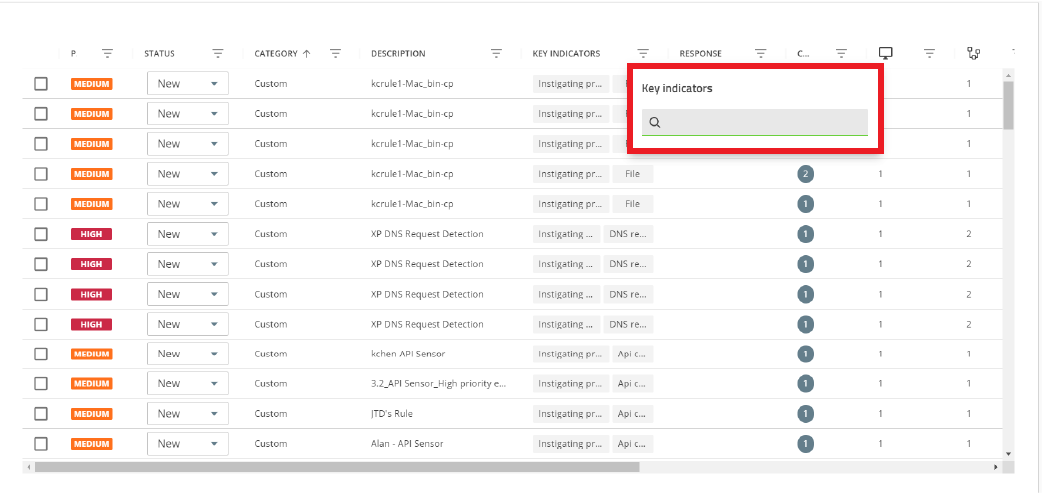
9. Search for alert groups by key indicator
Click a key indicator for an alert group and do any of the following:
- To look for alert groups by key indicator type, click the search icon.
- To look for alert groups by a key indicator value, hover over a value and click the search icon.
To learn more about the Cylance Endpoint Security management console and the aggregated alerts view, see the Cylance Endpoint Security Administration Guide.