Four simple steps to configure your Entra (SAML) authenticator to provide administrators with SSO access to the Cylance console.
Azure Active Directory is becoming Microsoft Entra ID.
Authenticators that were created prior to December 2023 do not allow users to directly access the Cylance console from their IDP console. To allow users to access the Cylance console from your IDP, you must generate a new SSO callback URL. This URL is generated when a new authenticator is created.
Important: Complete these steps only if your authenticator was created before December 2023 and you want to enable the IDP-initiated Proxy feature to allow users to use single sign-on (SSO) to access the Cylance console after logging into Entra ID.
Before you begin: Verify if Entra and the Cylance Endpoint security is enabled for SSO access to the management console. Complete the following steps:
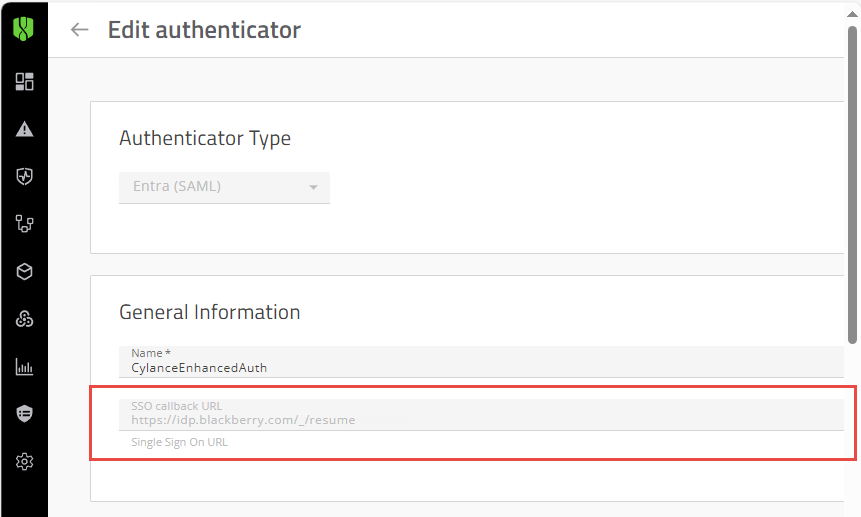
In the Cylance console, open the Entra (SAML) authenticator (Settings > Authentication).
- If the SSO callback URL is in the format of https://login.eid.blackberry.com/_/resume/saml20/<hash>, no further action is required.
- If the SSO callback URL is “https://idp.blackberry.com/_/resume”, complete the steps in this workflow to enable the IDP-initiated Proxy feature
In this workflow, you will complete the following tasks:
1. In the Cylance console,
a. Generate a new SSO callback URL.
b. Update your authentication policy.
2. In the Entra portal, update the Reply URL with the SSO Callback URL that was generated in the Cylance console.
Important: The claim names in the Entra configuration and the Cylance Endpoint Security authenticator configuration must match the claim names to allow the management console to retrieve the users’ credentials. If they do not match, users cannot sign in to the management console.
The following lists the settings that you will record from the Cylance console and update in the Entra portal.
Cylance Console authenticator |
Entra portal |
| SSO Callback URL The URL will be in the format of https://login.eid.blackberry.com/_/resume/saml20/<hash> |
Reply URL |
The following tasks will walk you through the steps to update your SSO callback URL and enable the IDP-initiated Proxy feature.
1. In the Cylance console, generate a new SSO Callback URL.
Use the copy option to copy your authenticator information and create the new SSO callback URL.
In the image, the numbers correspond to the step number in the procedure; not all steps are represented in the image.
- Open the Authenticators screen (Settings > Authentication).
- Click the current Entra (SAML) authenticator (for example, Enhanced Authentication).
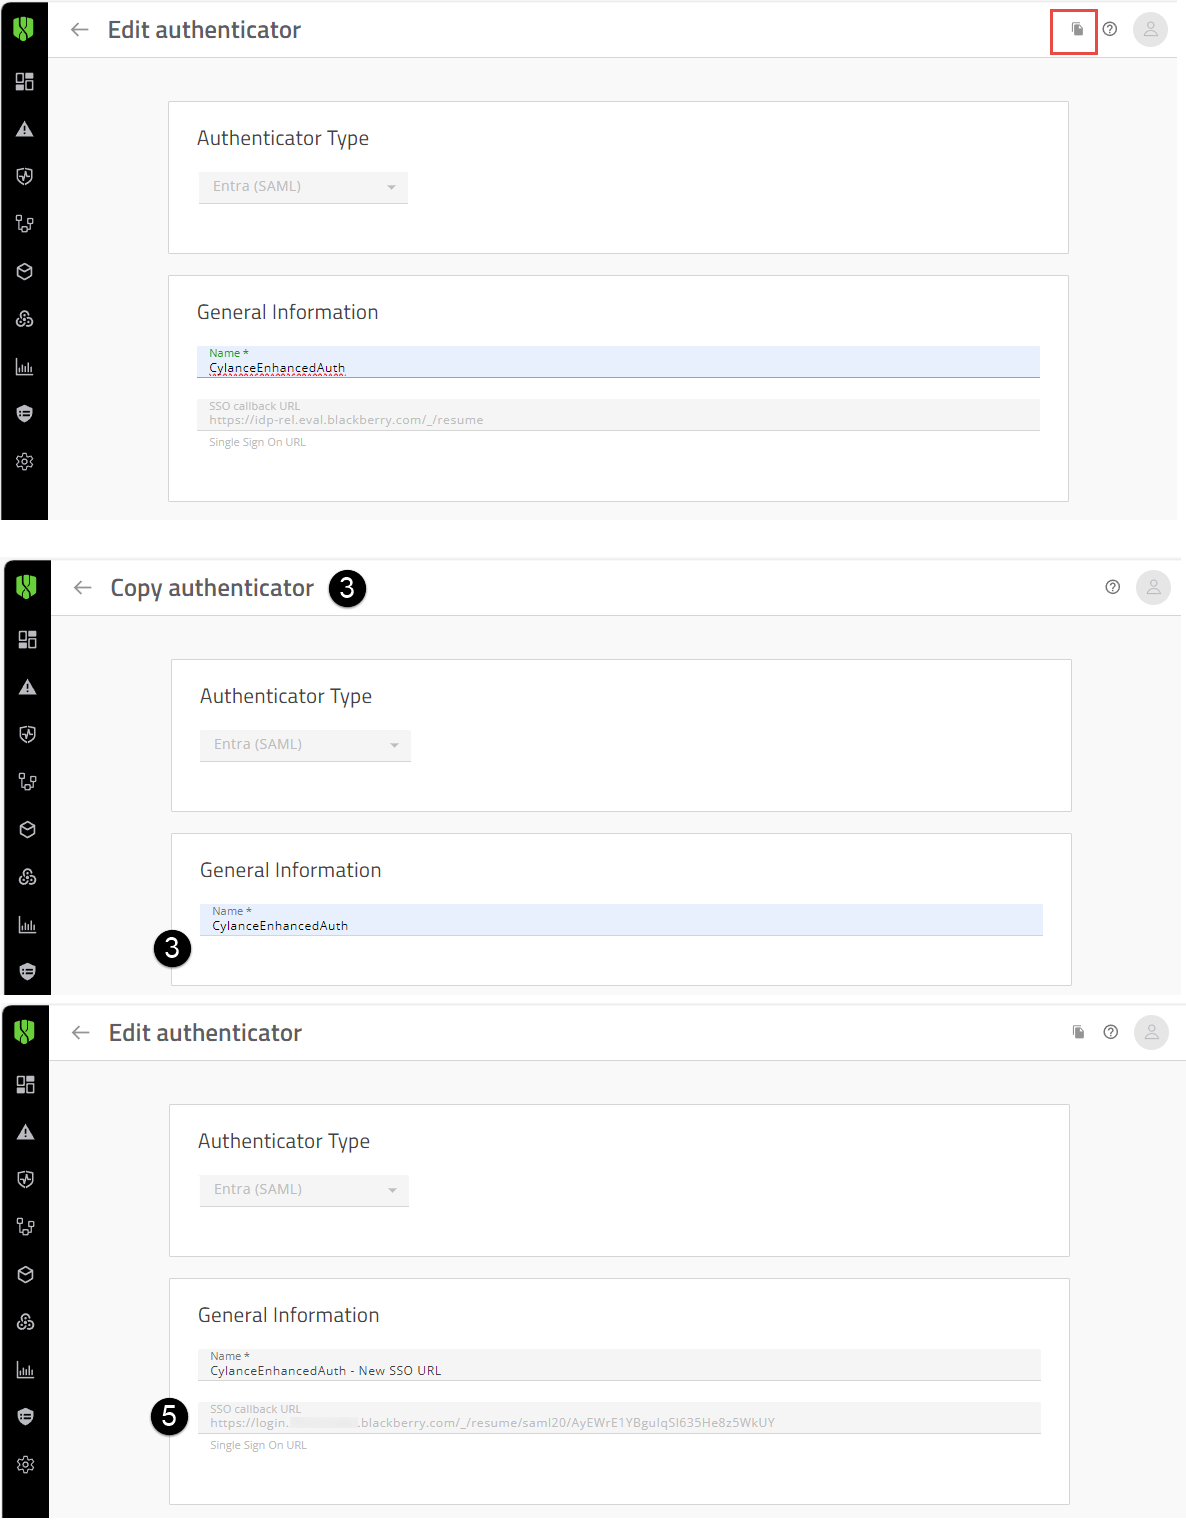
- Click the Copy icon in the upper-right hand corner of the screen (See image to the left).
When you click copy, the existing Authenticator heading changes from “Edit authenticator” to “Copy authenticator” and the current SSO callback URL filed is removed (see image to the left). - Update the name of the copied authenticator (for example, Enhanced Authentication – New SSO callback URL). Click Save.
- Open the updated authenticator. Record the SSO callback URL (see image to the left). Verify that the SSO URL is in the format https://login.eid.blackberry.com/_/resume/saml20/<hash>. This URL will be added to the Entra portal, Reply URL (Assertion Consumer URL) field in a later step.
2. Update the Authentication policy with the new SSO callback URL.
Add the updated authenticator to your authentication policy. You can also add the updated authenticator to the default authentication policies for the console, CylancePROTECT Mobile app, or CylanceGATEWAY agent.
Assign the policy to one administrator to verify the sign-in policy is functioning as expected. Only one policy type can be assigned to a user. You can then assign the authentication policy to your users.
In the image, the numbers correspond to the step number in the procedure; not all steps are represented in the image.
- On the menu bar, click Settings > User Policy.
- Click the Authentication tab.
- Click the authentication policy that you created for your users.
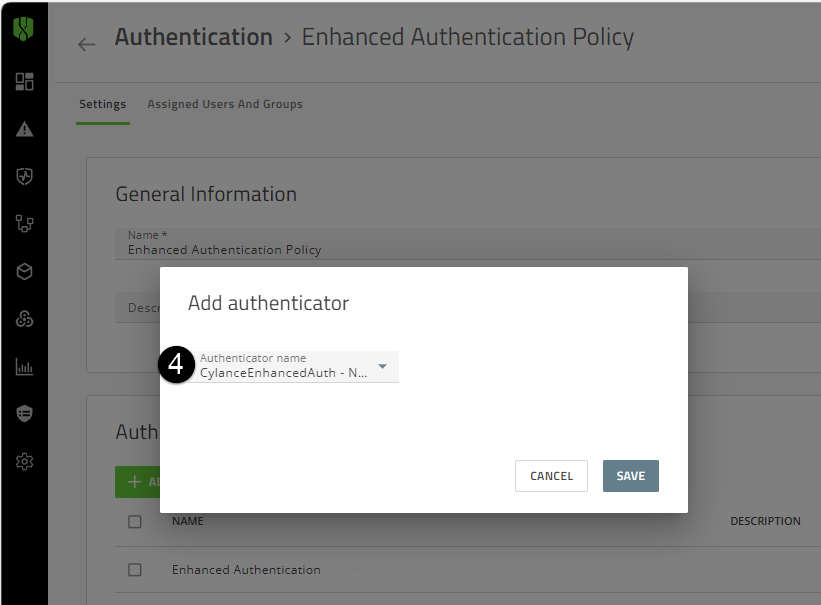
- In the Authenticator rules section, click Add Authenticator. In the Add authenticator dialog box, select the updated authenticator that you created in the last step (see image to the left).
- Click Save.
- Delete the original SAML authenticator from the Authentication rules list.
- Click Save.
- Delete the original Entra (SAML) authenticator (for example, Enhanced Authentication).
3. In the Entra portal, update the current Reply URL in the Basic SAML Configuration.
Replace the current Reply URL (Assertion Consumer Service URL) with the newly generated SSO callback URL to allow Entra users to communicate with and access the Cylance console directly from the Entra portal.
In the image, the numbers correspond to the step number in the procedure; not all steps are represented in the image.
- Open the current Basic SAML Configuration that you created (Home > Enterprise applications).
- In the left menu bar, in the Set up single sign on section, click Get started.
- In the Basic SAML Configuration section, click Edit.
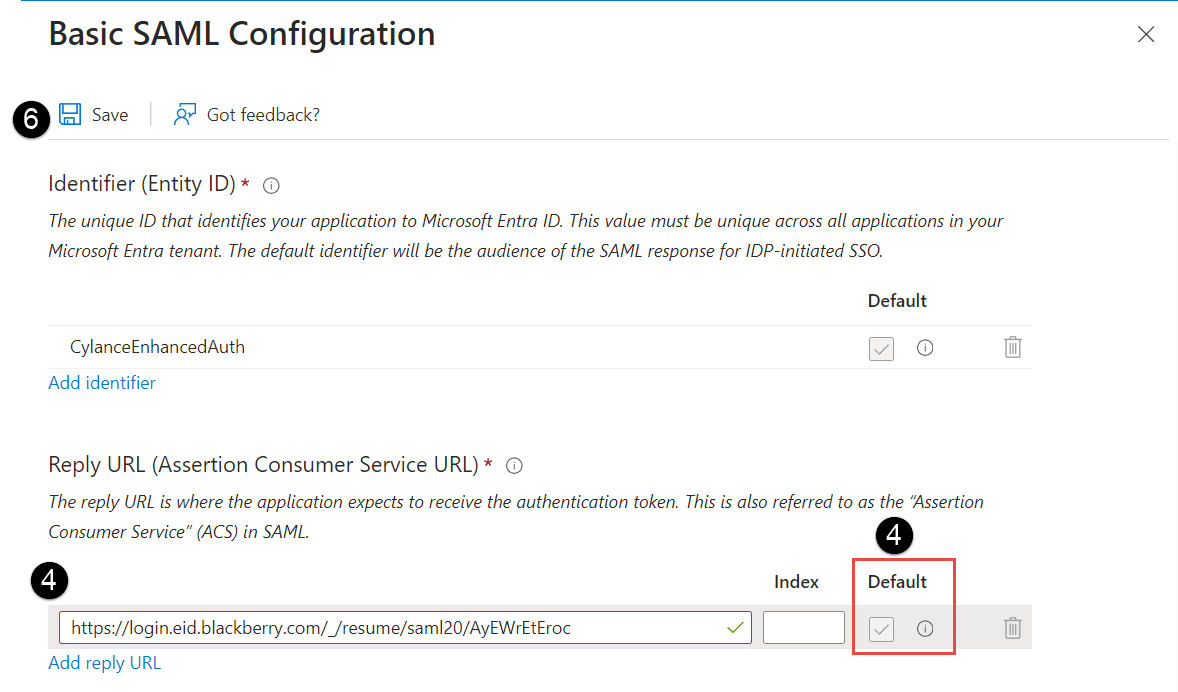
- In the Reply URL (Assertion Consumer Service URL) field, paste the newly created SSO callback URL that was generated in step 1.
• Verify that the SSO URL is in the format of https://login.eid.blackberry.com/_/resume/saml20/<hash>.
• If you have more than one Reply URL, must make sure that the Reply URL which includes the newly created SSO callback URL is set as Primary. If the incorrect reply to URL is used, users will be unable to sign in to the Cylance console. - Delete the original Reply URL.
- Click Save.
- Assigned users or groups to an application. When users or groups are assigned to an application, it will appear in the users’ IDP portal and allow the users to directly access the Cylance console using the application. For more information on how to assign an application, see your Microsoft Entra ID documentation.
4. Verify that you can sign-in the Cylance console.
- Verify that you can sign out and sign in to the Cylance console. Sign out and sign in to the Cylance console from the sign-in page using the administrator account with the updated authentication policy that was applied in step 2 and your Entra ID credentials.
Warning: Make sure that you sign in to the Cylance console from the primary sign-in page using your Entra credentials. If you test the sign in from the “Or sign in with your External Identity Provider” page and then Disable Custom Authentication, you may become locked out of the console.
- Verify that you can sign in using the application that you were assigned in step 3. If you cannot access the console from the application, visit support.blackberry.com/community to read article 114834.
5. That's it!
You have successfully enabled the IDP-initiated Proxy feature.
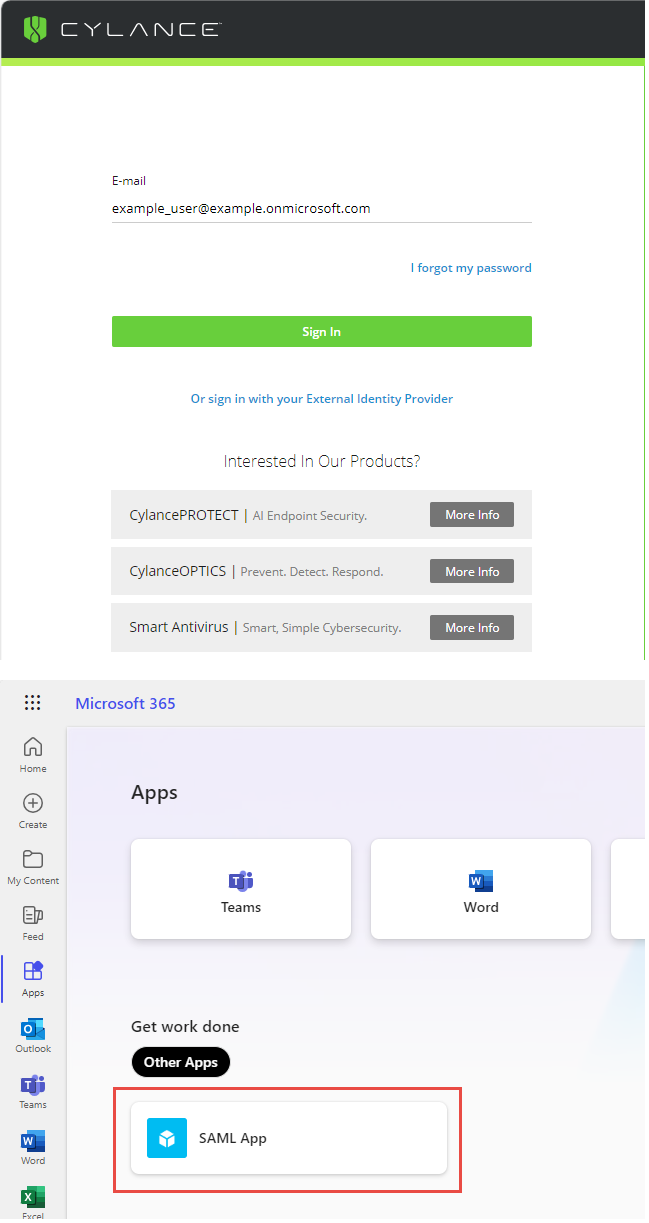
Users can now sign-in to the Cylance console using one of the following methods:
- Cylance console sign in: Go to the Cylance Console Sign-in page and sign in directly using your Entra ID authentication (see image to the left).
- IDP-initiated sign in: Sign in to your portal and click the application that was created in step 3 to Single Sign-in to the Cylance console (see image to the left).
For more information about configuring Entra to communicate with the Cylance console and allowing users to sign in using single sign on, see the Cylance Endpoint Security Setup Guide.