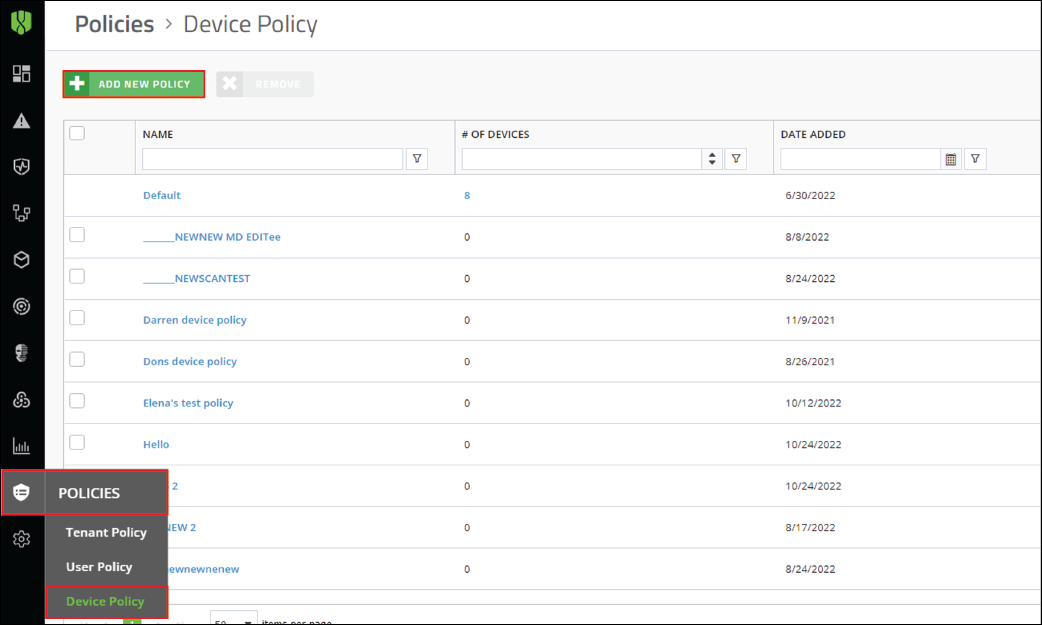
1. Create a test device policy
Type a name for the test policy, enable Auto Upload for all the available file types, and click Create.
2. Assign the policy to test endpoints
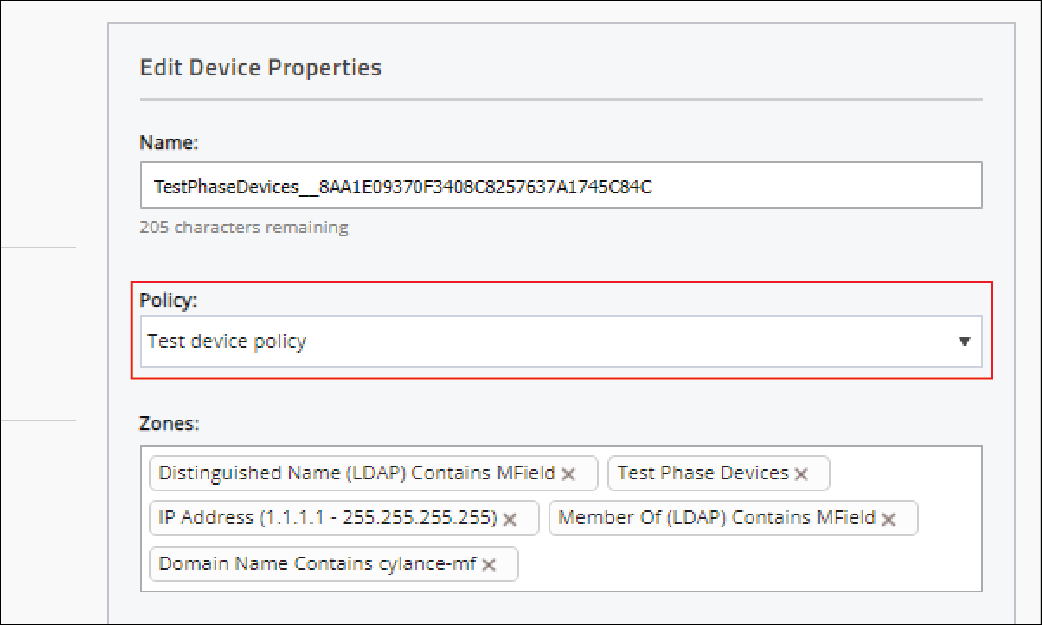
Go to Assets > Devices, click the device that you want to apply the test policy to, and select your test policy.
Allow the devices that you assign the test policy to to run for at least one day to capture daily usage activities.
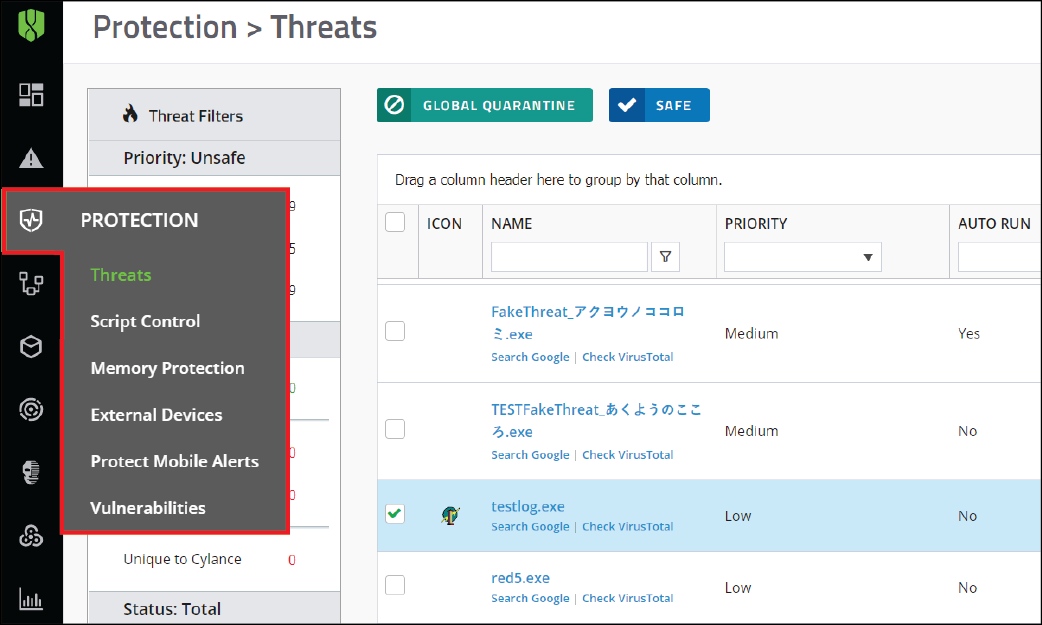
When you assign the test policy to endpoints, you can identify the applications and processes that are considered as threats but should be allowed to run on the endpoint. To view the applications and processes, go to Protection > Threats.
To allow those applications and processes to run on the endpoints, edit the test policy and add them to the policy safe list in the File Actions tab.

3. Edit the policy to enable Background Threat Detection
We recommend that you enable Background Threat Detection and select the Run Once option, and enable Watch For New Files.
To exclude specific folders from background threat detection, select Exclude Specific Folders (includes subfolders) and specify the folders to exclude. To allow the execution of files in the folders that you specified, click Allow execution. For more information about the protection settings fields, see Protection settings.
Save and test the policy to ensure that the applications that users are required to use are allowed to run.
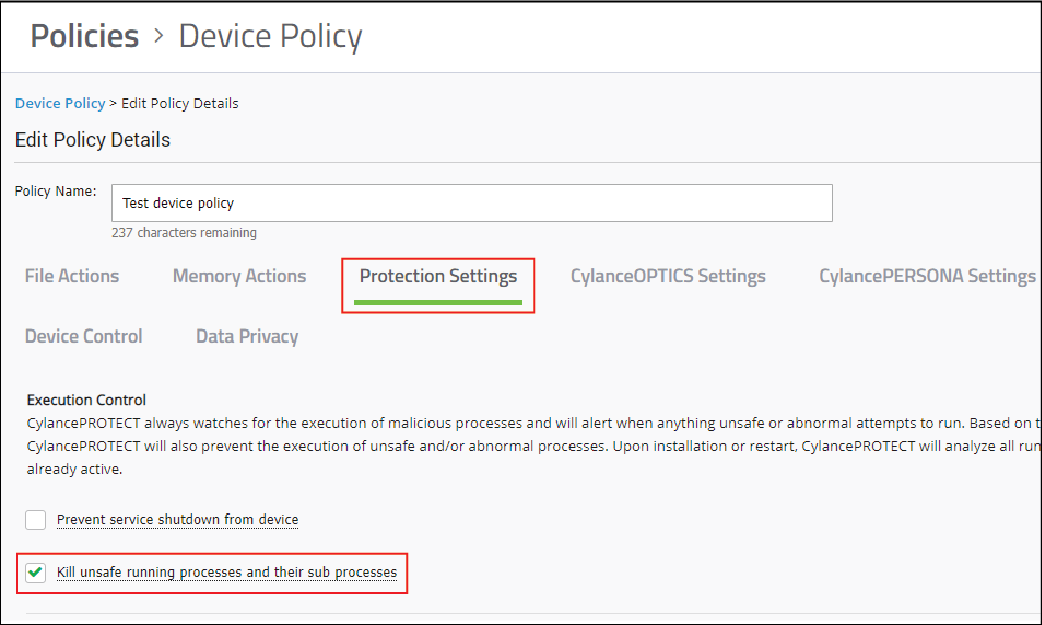
4. Edit the policy to enable the Kill unsafe running processes and their sub processes setting
Save and test the policy.
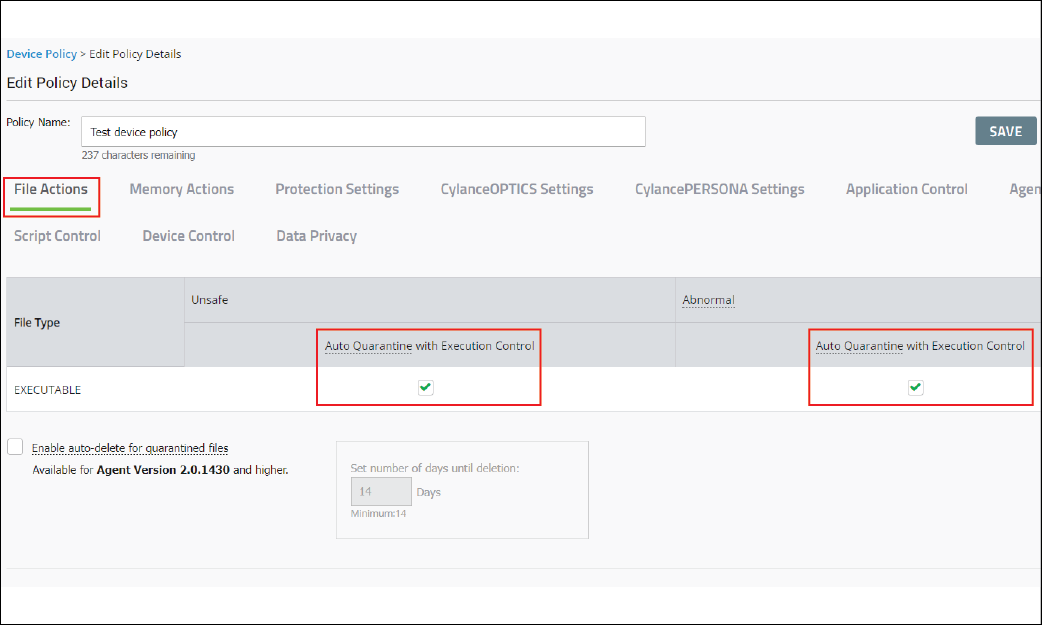
5. Edit the policy to enable the auto-quarantine settings for unsafe and abnormal files
Save and test the policy.
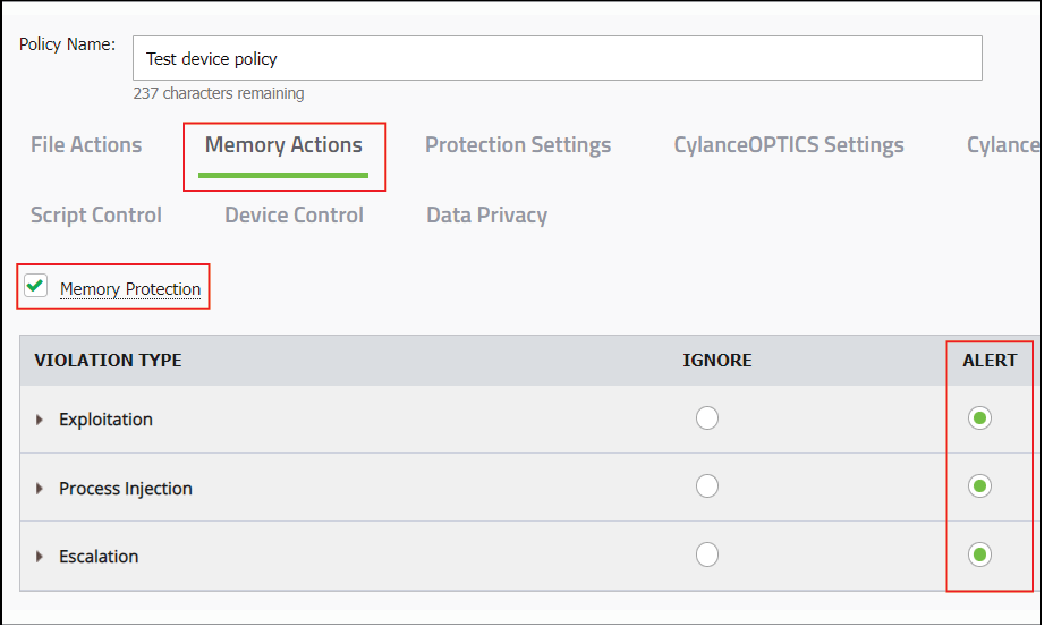
6. Edit the policy to enable Memory Protection
Set all the violation types to Alert.
Save and test the policy.
To view a list of memory protection alerts for processes that may be a threat, go to Protection > Memory Protection.

7. Add exclusions for memory actions
Save and test the policy again.
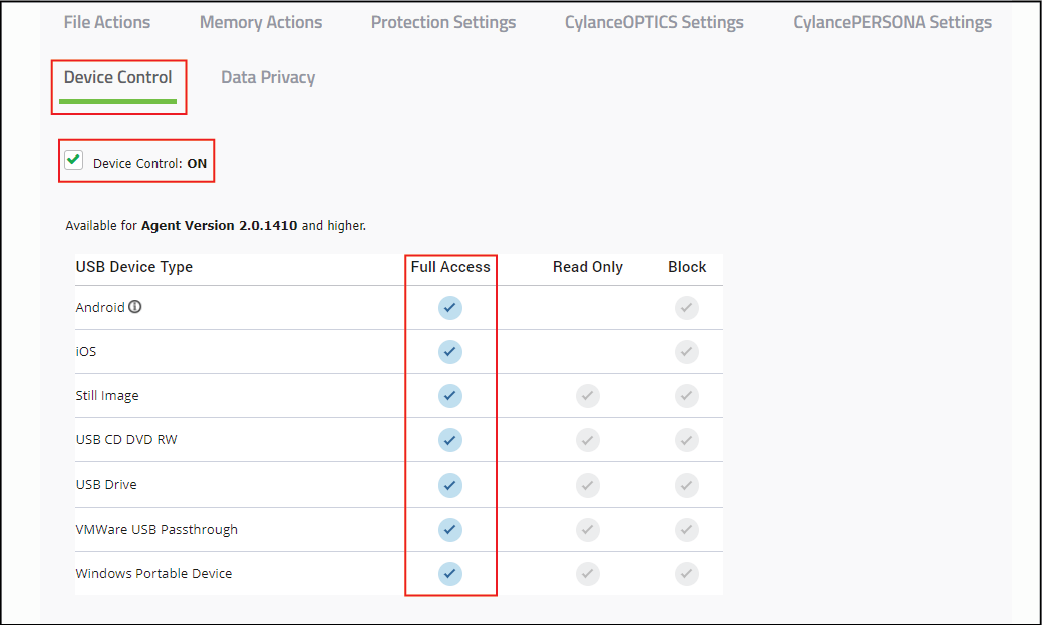
8. Edit the policy to enable Device Control
Set the access level for each of the USB device types to Full Access.
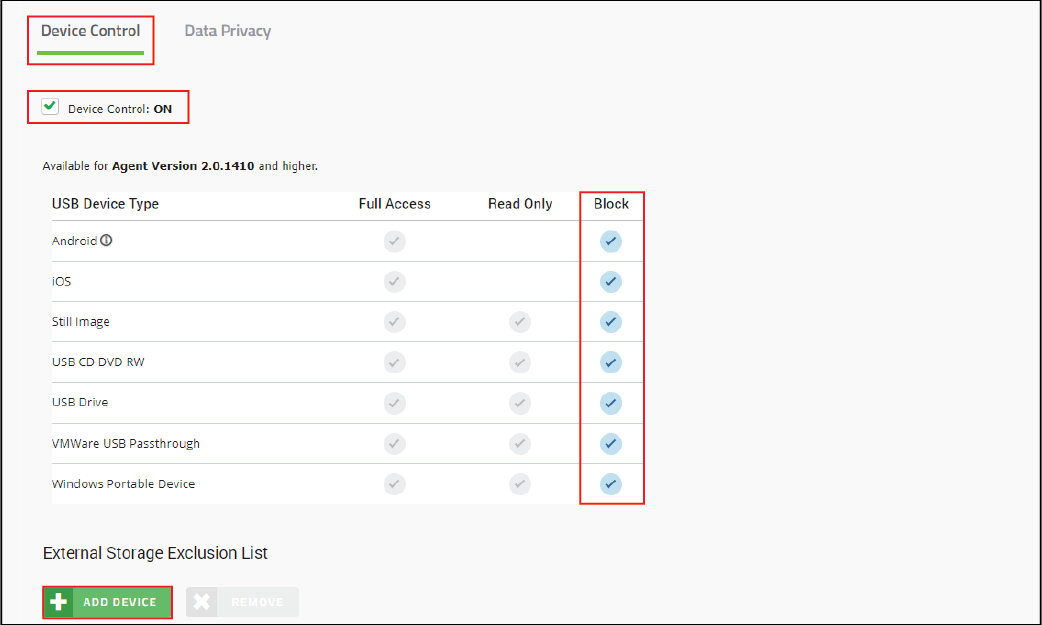
9. Add the devices that you want to allow
On a test device, insert USB devices that you want to allow. You can copy the USB devices’ information from Protection > External Devices to add them to the exclusion list.
After you set the exclusions and complete your testing, set the access level for each of the USB device types to Block.
Save and test the policy again.
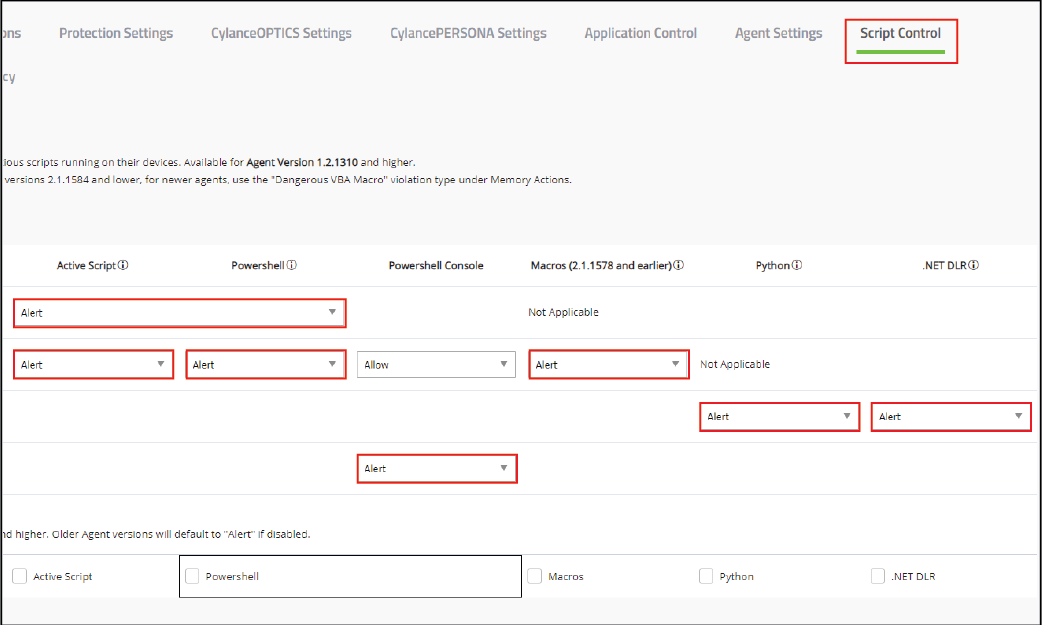
10. Edit the device policy to enable Script Control
Set the policy for each of the script types to Alert.
Save and test the policy.
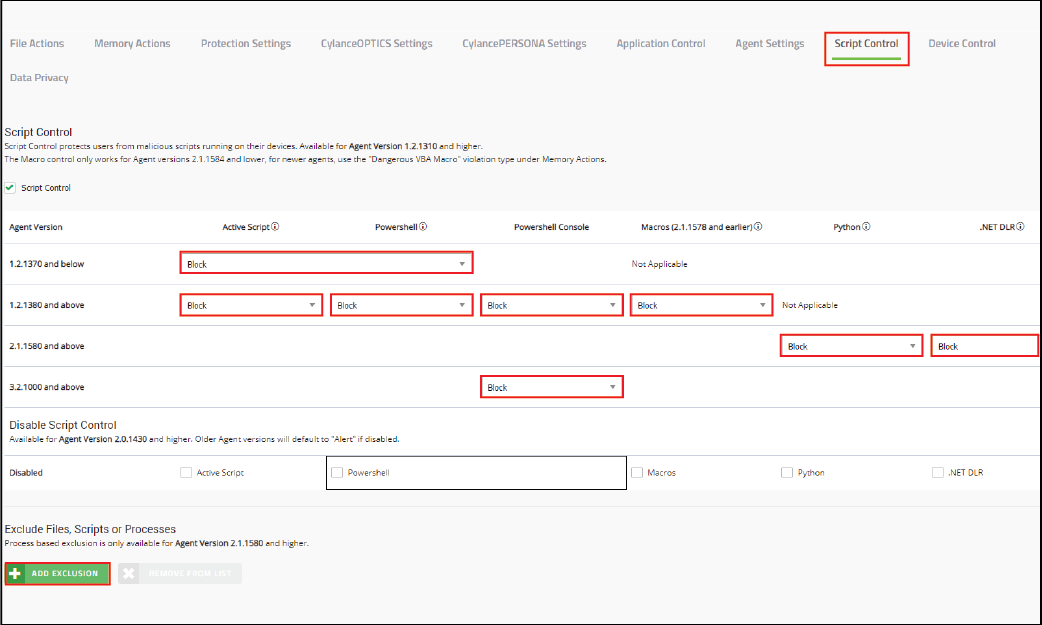
11. Add exclusions for the scripts that you want to allow
To identify the scripts that were on the devices that you want to allow, go to Protection > Script Control.
BlackBerry recommends testing the script control policy for at least one week.
After you set the exclusions and complete your testing, set the policy for each of the script types to Block.
Save and test the policy again.
That's it!
You now know how to create and customize a CylancePROTECT Desktop test policy.
After you finish: Continue to monitor the Protection tabs in your management console. If threats are blocked but should be allowed, you can add more exclusions to the respective policies.
For more information about creating a CylancePROTECT Desktop test policy, see Create a CylancePROTECT Desktop test policy.